
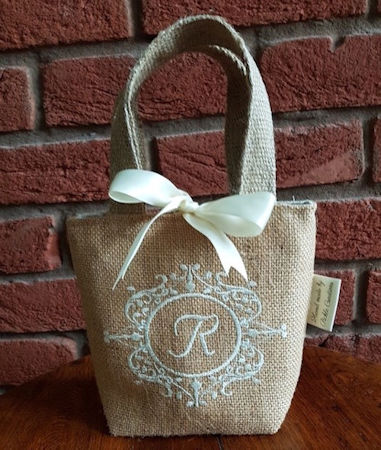
How to make this quick and cute Gift Bag
Created by Cathy
http://www.picklecreations.co.uk/
Description
A relatively simple and quick craft project to produce a small gift bag, that just adds that something special to a gift.
Cutting List
|
Number Required |
Dimensions |
Material |
Comments |
|
2 |
12½” x 2” |
For this project I used 2” wide jute webbing that is normally used for upholstery.
OR, you can coordinate by using the same material used for the main bag. In which case you will need 2 strips of 4” x 12.5” fabric. |
Bag handles. Two options available. |
|
2 |
8½”w x 9”h |
Hessian, cotton canvas, denim, or anything that has a bit of natural body / stiffness. |
Front and back of bag. |
|
2 |
8½”w x 9”h |
Cotton, poly cotton, or, similar. |
Front and back lining. |
|
2 |
12” x 1” |
Ribbon |
Fastening. |
Embellishment
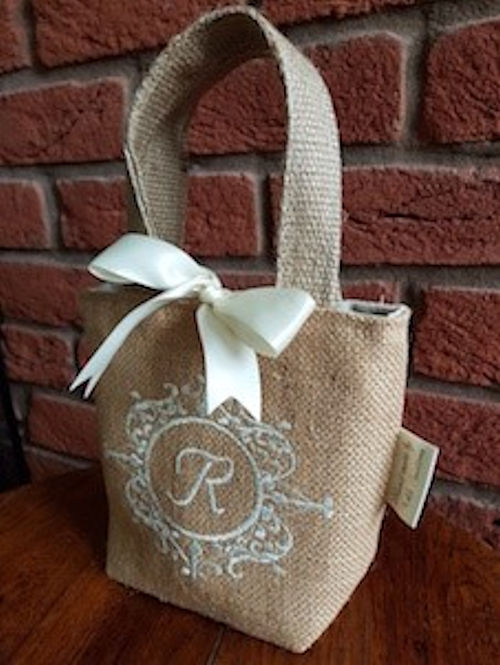
To further enhance this project, you can additionally add an embroidery design, or, appliqué of your choice.
Kreative Kiwi Design
There are a couple of other variants that I have also made at the end of these instructions, that may give you additional ideas?
STEP 1 – Cutting out
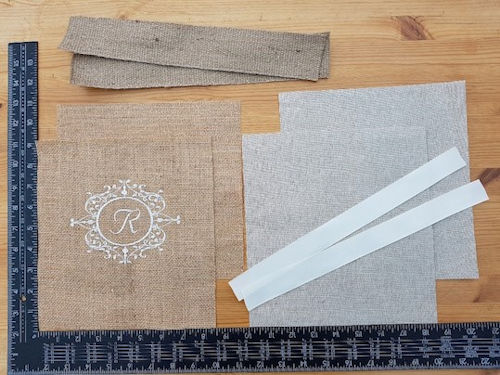
As you can see, from the above, there are not many pieces required for this project.
If you are going to use an embroidery design, do just check that the design will fit on the bag. The dimensions used in this project should accommodate any design that can be created in a 5” x 7” hoop.
If you are going to use an embroidery design, hoop-up and create the design, or, create the appliqué design and then attach to what will form the front of the gift bag.
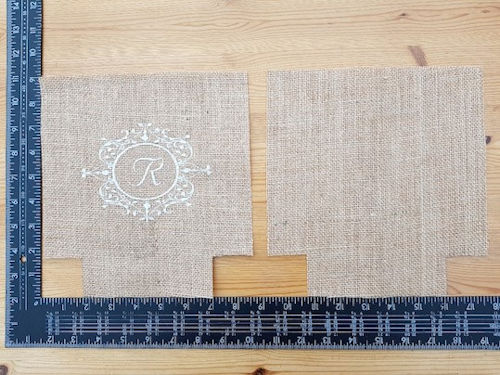
Cut a 1½” square from the bottom corners of the bag front and back.
STEP 2 – Creating the bag
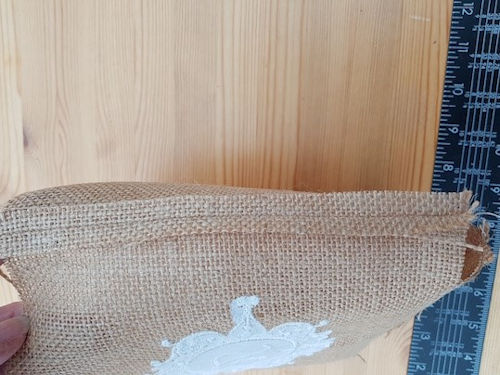
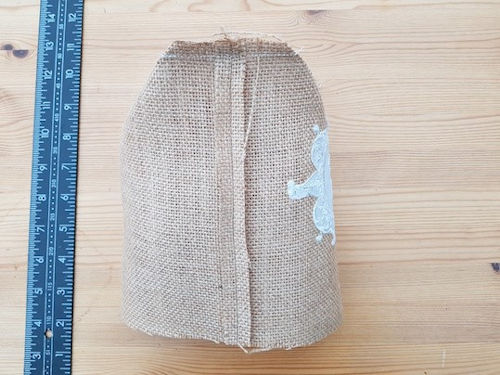
Place the front and back pieces of the bag together, making sure that the design is on the inside. Machine a ¼” seam along both the sides and along the bottom, as shown above.
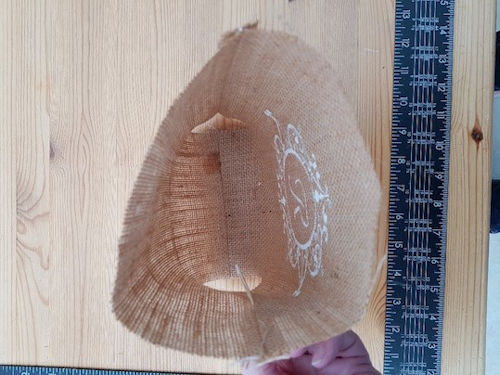
After machining the bag should look similar to above. As you can see the design is on the inside of the bag.
The corners are left open at this stage.
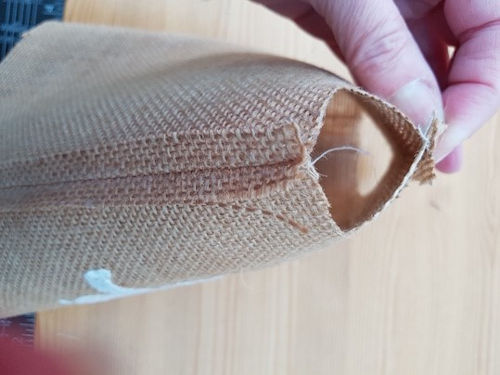
To machine the corner squeeze, matching the side seam with the bottom seam, as shown above then machine with a ¼” seam.
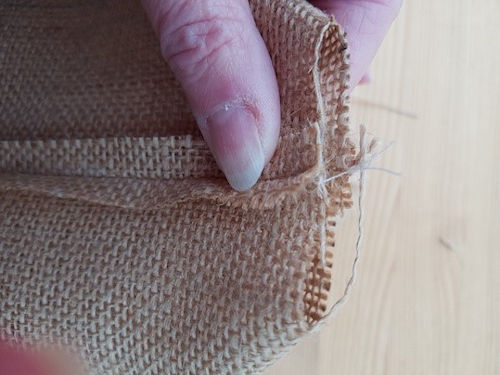
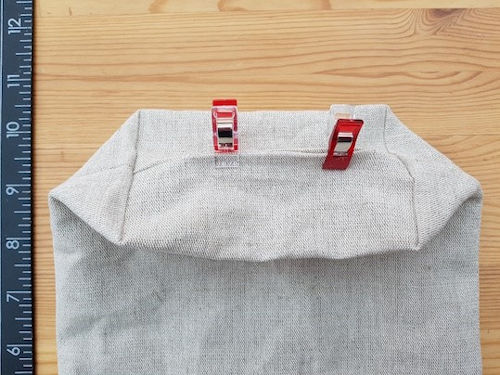
Repeat for the other corner, so it should then look like the picture above.
Shown from another angle.
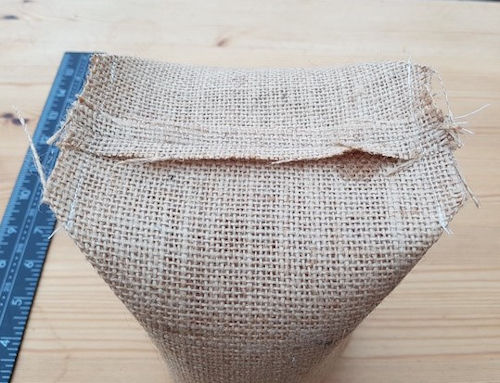
Turn right way out and press.
STEP 3 - Handles
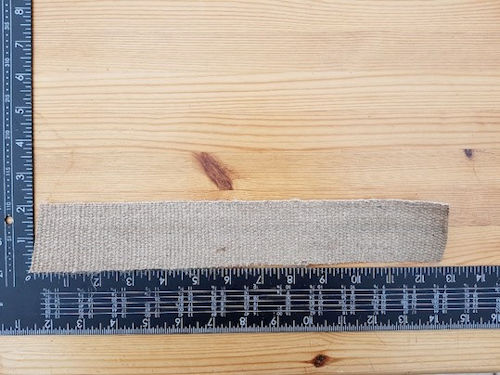
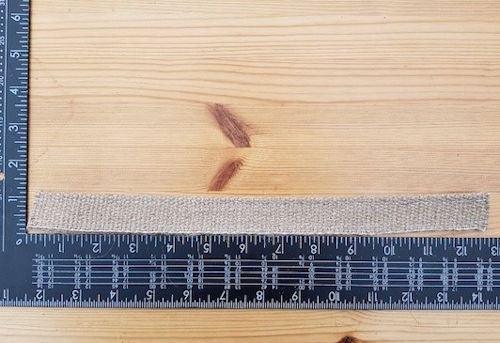
Option A, I used hessian jute webbing, normally used for upholstery. This is 2” wide.
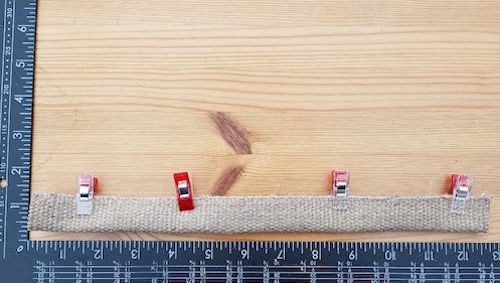
Fold in half lengthways and pin, or, clip in place.
Having folded in half, machine lengthways close to both edges, to give a finished handle.
Option B: If you do not have jute webbing.
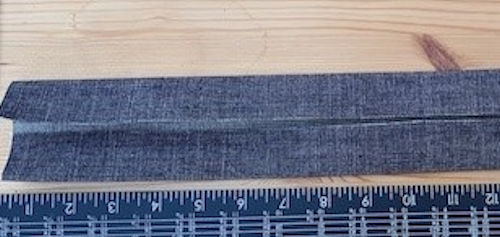
Using a strip of fabric 12” x 4”. Fold lengthways 1” into the centre, then repeat for the other side. Press with an iron, so it looks like the picture above, i.e. 2” wide with two 1” flaps.
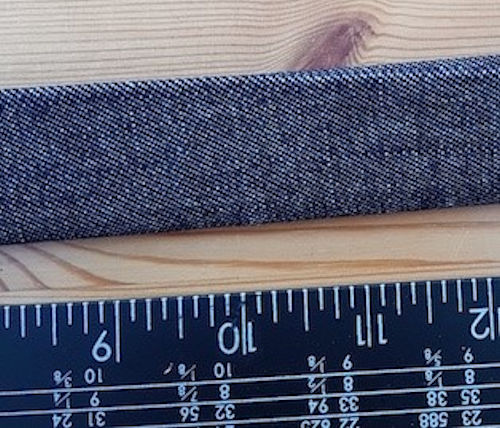
Now fold in half, which will mean the edges are now encased. Machine along the length of the handle, close to both the long edges, to finish the handle.
STEP 4 – Ribbon Fastening and Handle
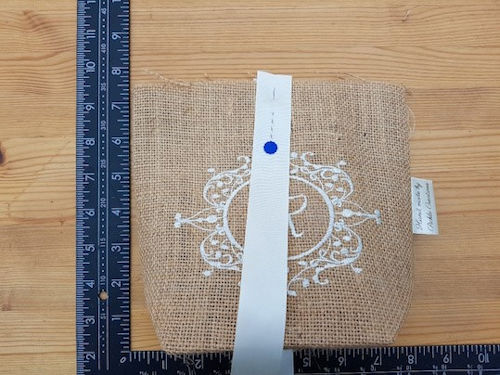
Pin in place the ribbon, on both sides of the bag, making sure that it is central. This will be used to tie the bow and close the completed bag.
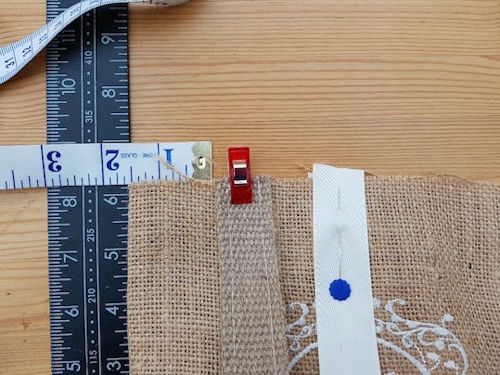
Pin the handles in place 1½” in from both edges of the bag, ensuring that they are not twisted.
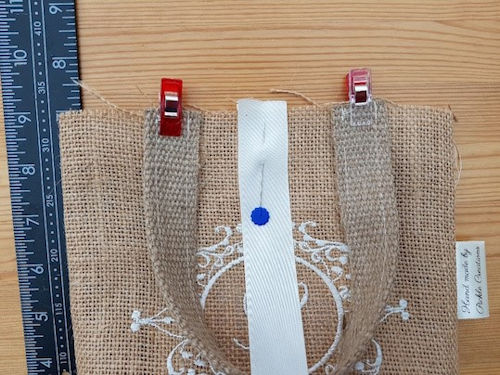
The above shows one side of the bag, with the handle and ribbon pinned / clipped in place.

Secure the handles and ribbon in place with a ¼” seam.
STEP 5 – Lining
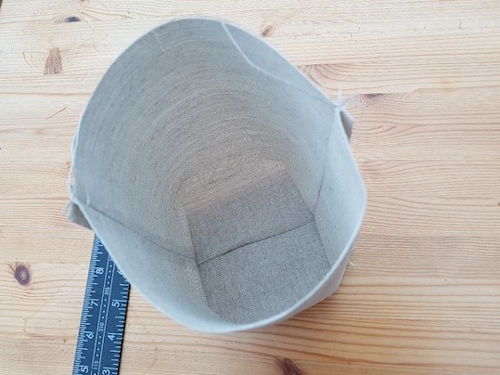
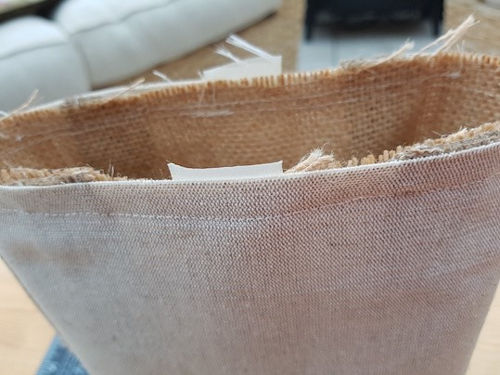
Complete the lining in the same manner as the bag outer, BUT leaving about a 3½” gap in the bottom of the lining. This will be used for turning the bag right way out, once it is completed
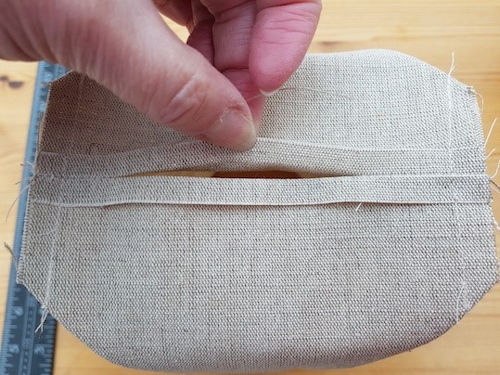
The picture above shows the gap, left in the bottom of the lining.
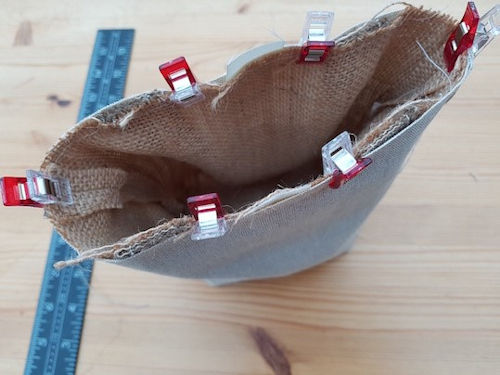
Place the bag outer inside the lining (right sides to right sides), as shown above. Make sure that the handles and ribbon are also inside and away from where they may get caught when machining the top seam.
Machine around with a ½” seam.
Now turn your bag right sides out, through the hole that was left in the bottom of the lining.
Close the hole that was left for turning, either by machine, or, hand stitching. Push lining down into the bag and press well.
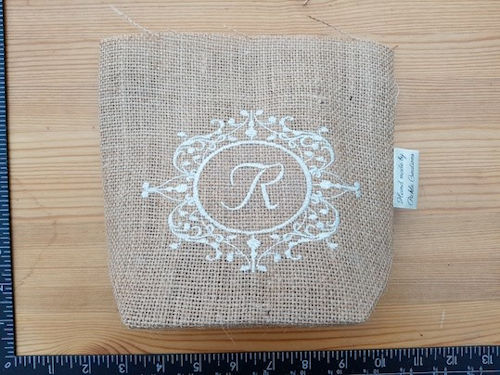
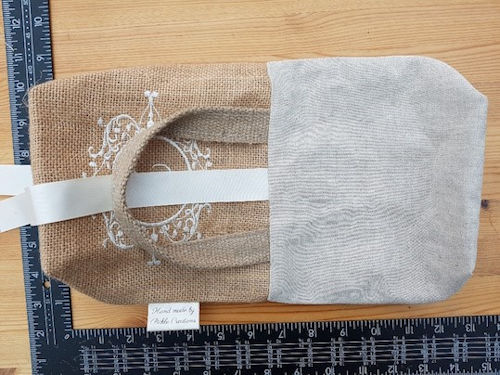
You should now have a completed bag.
Variants
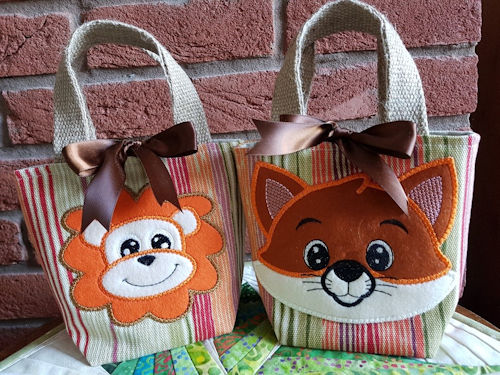
For the lion I used just the head of the Lion from the Kreative Kiwi design
and for the fox, I used just the head from the Kreative Kiwi design
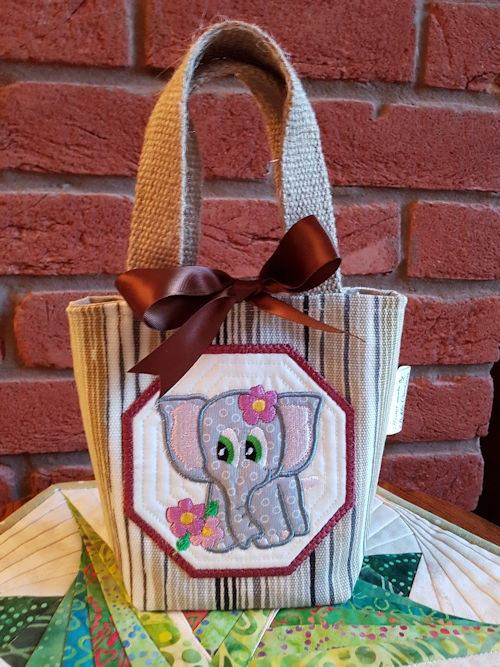
I used the elephant from the Kreative Kiwi design
CONTACT DETAILS
eMail: cathy1981@live.co.uk
Website: http://picklecreations.co.uk/PickleCreations/Welcome.html
Etsy Shop: PickleCreationsShop
