Machine Embroidery Cake Decoration Kits
Our very clever Darina has been at it again, and created these stunningly beautiful Cake decoration kits. Darina has very kindly shared her how to guide.
Darina’s Cake Decoration Kits
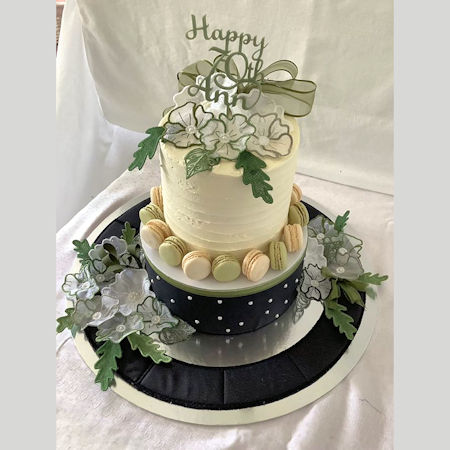
These creations have come about after I decided to organise my sister’s 70th birthday cake. After being quoted a crazy price for something quite simple I decided to do something myself.
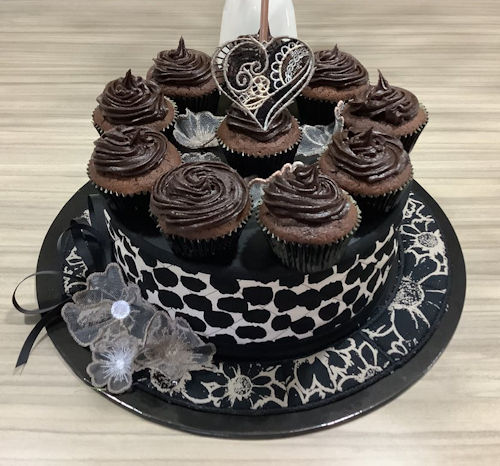
Just so happened that I was about to test out the new KK wreath pattern and decided to do it in black velvet!
Perfect idea and started the foundation of my Cake Kits.
I have used many Kreative Kiwi designs but I have also had to source from other places to find all the variations needed.
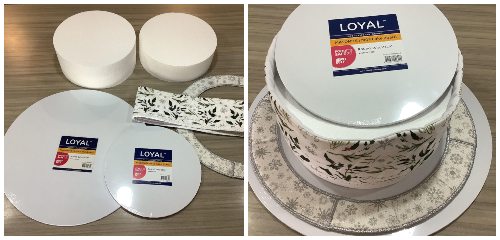
These are the two basic sizes.
|
Cake Board Size
|
Cake Dummy
|
Base Ring
KK-Wreath Design
|
Ring Measures
|
|
20”/51cm
|
10” x 3” or 4”
25 x 8 or 10 cm |
8x12 hoop
design
|
18.6” 47cm
|
|
16”/40cm
|
As Above
|
6x9 hoop
design
|
14.5” 37cm
|
CONSTRUCTION
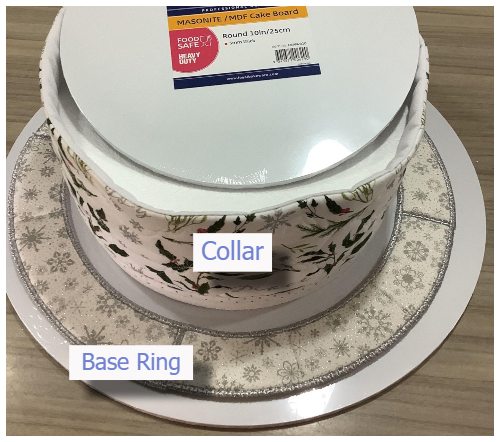
BASE RING
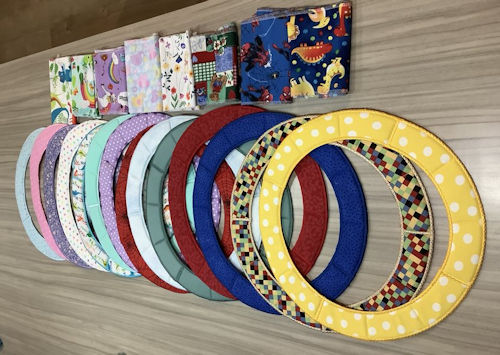
Make the In the hoop Wreath Base by Kay
(includes a step-by-step video)
This set includes the Free Standing Lace Leaves used in Darina's 70th Cake
COLLAR
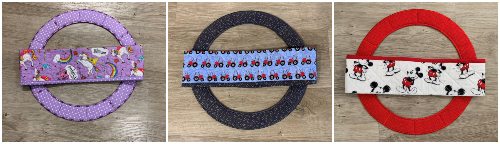
- Firstly cut just a single strip of outer fabric 33-34” long. Then the width is the height of the dummy plus 1.5” for seams or trimming.
- Cut a piece of wadding/batting the same length but ONLY the height of the foam dummy. I have used the 3” and 4”.
- Cut a piece of lining the same size as the outer fabric.
- Quilt the batting and top fabric
- I have used the KK Free Cross Hatch design on quite a few. As the strip is 33/34 inches, you may need to align and rehoop. Or use your sewing machine to do some straight stitching lines on your normal sewing machine about ¾” apart.
- Once your quilting is done lay your lining face to face with your quilted piece and stitch together across the top.
- Press open them fold down and press flat. Open back up flat.
- Then wrap your collar around your dummy, face down, to get an accurate stitching position for the side seam. This needs to be firm.
- Stitch your side seam.
- Neaten bottom seam
- There are several options on how you finish your collar. I like to fold it down, pin in place then stitch then overlock(serge) the bottom seam. I then make a 2” cut strip and make a binding for the bottom. You also have the option of binding the top and the bottom. Thirdly you can add some lovely ribbons, braids, or pipings. Let your imagination create something lovely.
ASSEMBLY
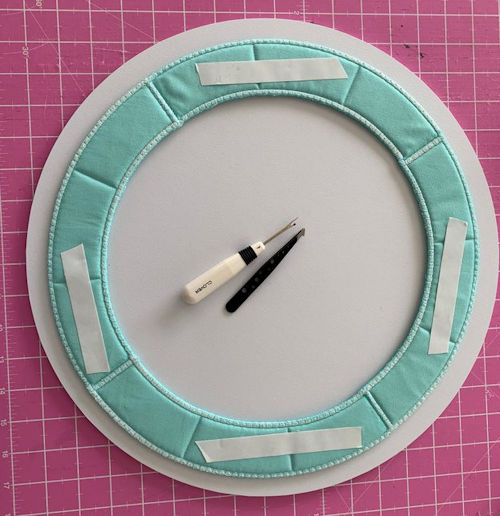
Double sided tape has become my best friend!
It allows for easy assembly and also easy removal to be able to recycle.
-
Turn the base circle face down and put four pieces of double sided down.
-
Remove the paper – simplest method is a seam ripper/quick unpick and a pair of tweezers.
-
Turn over and carefully place in the centre of your cake board.
After sliding your collar over the cake dummy put 2 long pieces of d/s tape underneath. Then press into the centre of your board/base ring.
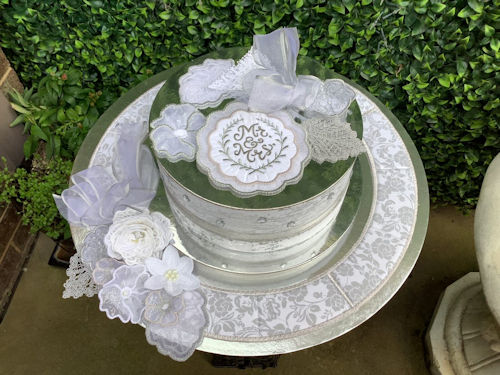
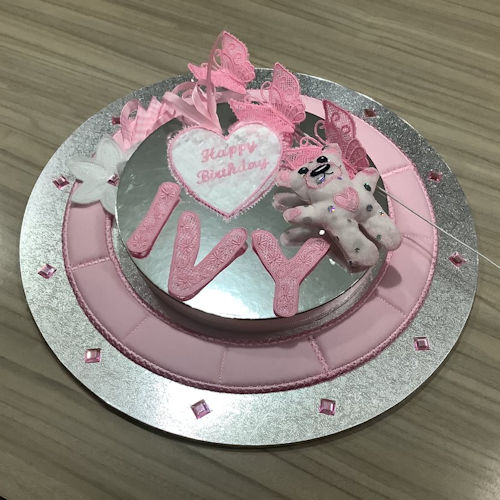
DECORATIONS
This is the fun part. Only limited by your imagination.
Flowers, hearts, leaves, animals, children, alphabets and numbers have all featured on my cakes.
|
To make life easy, we have bundled together the three Kreative Kiwi freebies together in three sizes |
One of my favourites is the Free lace butterfly.
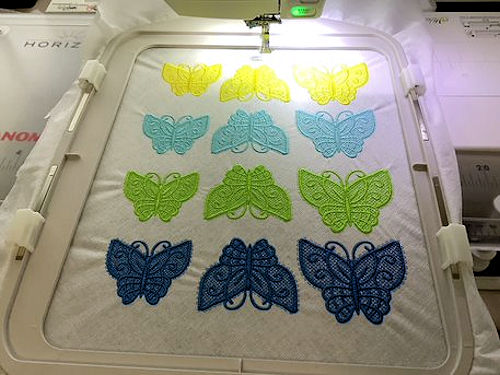
I have embroidered three butterflies varying in size. So I have done one @ 80%, one @ 90% and one at 100%.
I then hot glue them onto a florist wire to make them look like they are flying away.

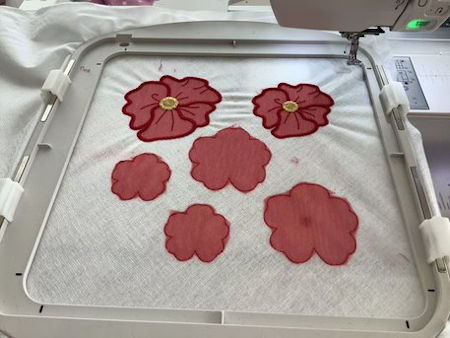
I have used a couple of the Free Flowers from Kreative Kiwi - the Free Poppy Coaster and Free Flower Coaster In the hoop
Rather than stitch these designs on fabric (original instructions) - I have made them with many different sizes and fabrics like tuile, mesh, satin and chiffon. If the design is free standing lace I have not used fabrics.
I make them as below
To Make the Flowers
-
Hoop up just one layer of wash away and lay one or two layers of the fabric you choose. Eg mesh, tuille, net, chiffon etc.
-
Stitch the outline on the stabiliser.
-
Add the fabrics (one or two layers) and stitch outline again. These fabrics could be a tuille and a softer fabric for effect.
-
Trim away the excess then continue with the embroidery.
-
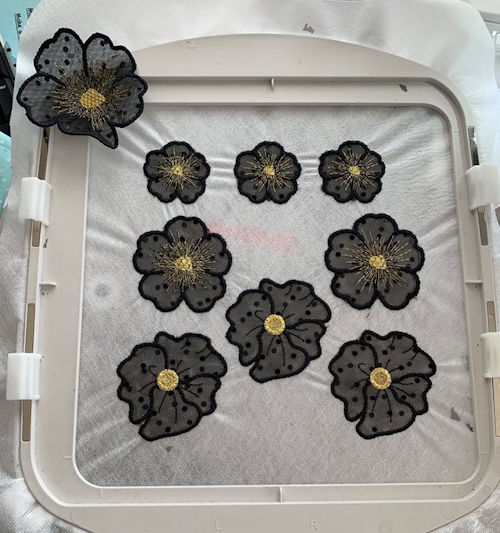
There is no need to put a layer on the back of the hoop as the stabiliser washes away easily under a hot running tap. I don’t necessarily remove it all as it helps to shape the flowers and give them a bit of body.
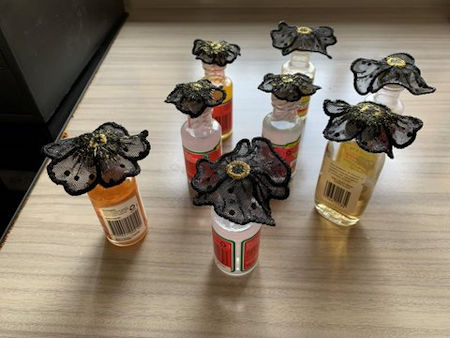
-
Once rinsed away I put on a tea towel and dab the worst of the water away, then if required position over the lids of the essence bottles (or chosen item) and press around the lid with your fingers.
-
Leave to dry completely.
-
If you are not happy with the shape at any time you can just wet it again and have another try.
-
Some items do not need shaping so just leave to dry on a cloth or bench.
-
I also press some with a pressing cloth or piece of fabric over them. Do not push out on the edges too much as the stitching can pull away from the edge as they can be a little delicate.
-
Add to your cake in layers with hot glue. Can also add a nice diamante. I have found some great ones used for scrapbooking. Quite cheap and add a lovely finish. Even though they have a sticky back I do advise gluing in place.
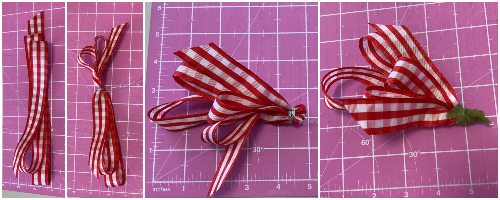
Ribbons are a lovely edition. I fold a piece of ribbon about 1m (39”) back and forth on top of itself about three times then use a piece of florist wire around the slightly off centre. Then fold up in half and continue with the wire until secure. Fold back and twist excess wire which I have trimmed back. I have neatened with a little florist ribbon on some.
Well these are some basic ideas and tricks I have created. They have grown over the short time since I came up with the idea. I have made them up into the kits which I will have when our market stalls start up again in October…the beginning of our warmer weather down under!
INSPIRATION
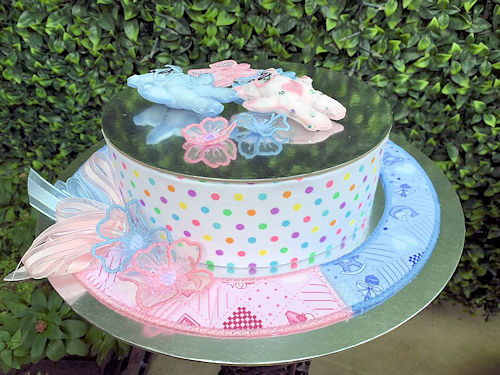
Baby Reveal Cake