
In the hoop Embroidery - Hints and Tips

WHAT ARE IN THE HOOP DESIGNS?
In the hoop designs are complete items/projects that you can make completely in your Embroidery Hoop.
The 'beauty' of In the hoop Designs are they are quick to make, really good for using up your fabric scraps, and you don't need to get your sewing machine out!
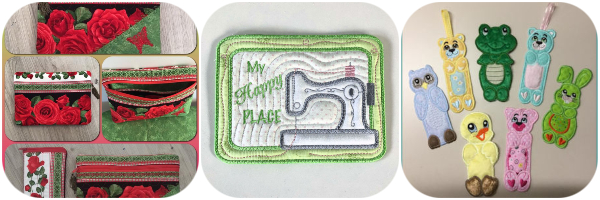
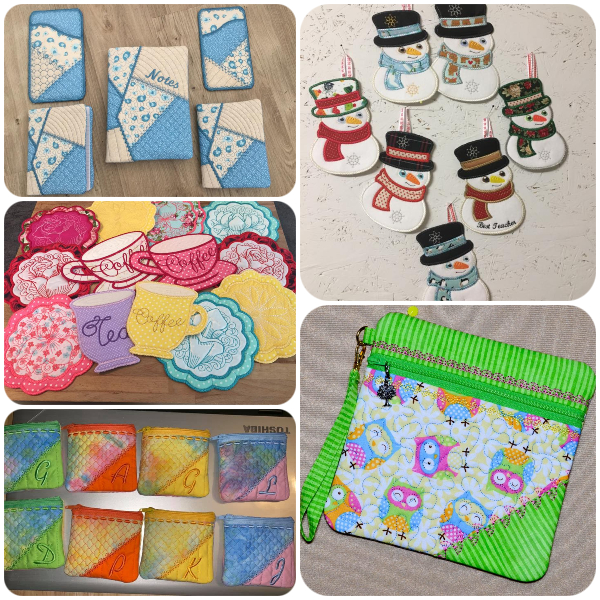
The items you can make are varied - we have Coasters, Bookmarks, Notebook Covers, photo frames and even Bags made In the hoop
| We've been designing, stitching and selling these style of designs for quite a few years now, and along the way, we've learnt a few hints and tips, and our wonderful Kreative Kiwi Group have freely shared their ideas. We've compiled this information, so you can benefit from our knowledge, and confidentally stitch these In the hoop Designs |
|
Excited to get started, or learn by watching? Click here to Download our Free In the hoop Flower Coaster Watch this quick 5 minute video showing Step-by-step How to Stitch our Flower Coaster |
Want to know a bit more? Read our tips
WHAT MATERIALS/EQUIPMENT DO YOU NEED?
SHARP SCISSORS
Click here to read about the type of scissors used for Applique STABILISERSMany In the hoop projects use Cutaway or Tearaway Stabiliser, but some recommend Water Soluble Stabiliser
The specific stabiliser you use with be listed in your design Instructions.
WATER SOLUBLE STABILISERWe recommend using two layers of fabric type Water Soluble Stabiliser Why? - Two reasons
Not sure what we mean about Stabilisers, or where you can purchase the correct type? Click here to read further information on Stabilisers
BATTING/PELLON/WADDINGWhy do you use Pellon in these Designs?
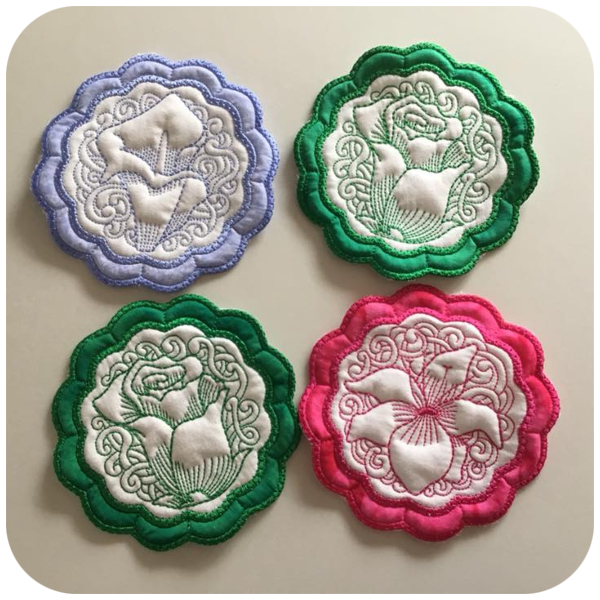
I Love Pellon – I use it in ALL of my Large Appliques and In the hoop Projects because It gives the designs ‘body’, it enhances the Quilting stitches, and I believe it ensures a really ‘neat’ Satin Stitch edge. The sample above is our In the hoop Floral Coasters- you can see the Quilted look that the Pellon makes. The pellon I use (we seem to have different names in NZ) is a thin (maybe ¼ inch) polyester or, a slightly thicker iron on pellon (I rarely iron it on) Can you use other Batting/Wadding/insul-brite for Coasterss?Yes – I would opt for the thin versions, just to help your machine. Can I make In the hoop projects without pellon/batting?Yes you can – once again – you may find the Satin Stitch edging is not quite as crisp, I would test it first on fabric of similar weight (you’ll only have to test one section, to see if you like it)
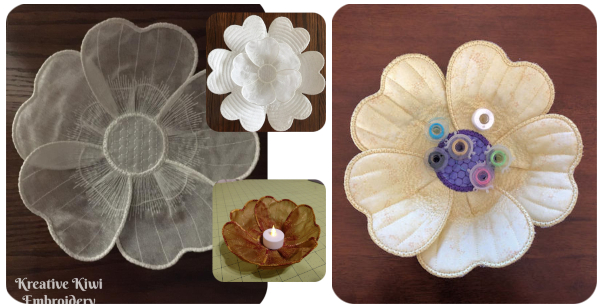
The 3D Flower on the right is our 4x4 hoop size - Helen and Sharon from our Kreative Kiwi Group stitched the design on organza without Batting FABRICS USED IN IN THE HOOP PROJECTSDepending on the item you are making, you can pretty much use any fabric. We tend to use cottons, but I've seen Coasters made with Vinyl, Denim or Satin. If you do choose to use a fabric other than cotton, I would recommend to do a test sample first - with vinyl or heavy denim you probably won't need any Batting - with Satin, I would recommend pressing an iron on interfacing on the back, to help stop the Satin fraying.
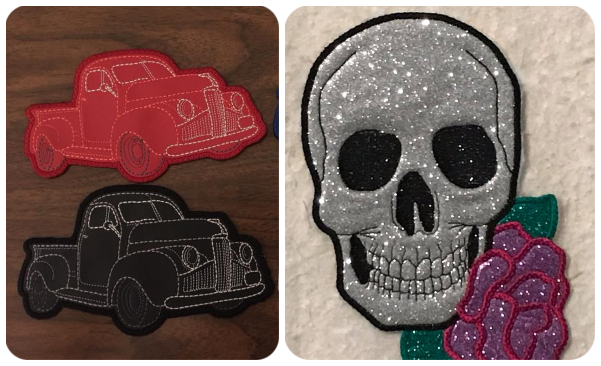
Free Truck Coaster and Skull Coaster made with Vinyls BACKING FABRICSThis is dependant on the use of the finished product. If you are not going to be able to see the back of the finished product ie stitching the design to a Quilt/Bag etc, then you can use any ‘cotton’ fabric. For reversable Coasters, I have been using a very thin iron-on Interfacing on the backing fabric – just makes the fabric easier to cut on the back of the hoop, and no threads peeking out of the satin stitch.
|


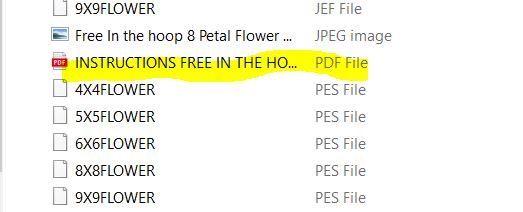
DESIGN FILES
INSTRUCTIONSEVERY In the Hoop Design File has a PDF with Step-by-step Photos - When you unzip the files, please look for the PDF and have a quick read.
CONSTRUCTIONYou must Stitch the designs in the correct order – this ensures your design is stitched together correctly Similarly, Do Not Color Sort our In the hoop designs – We use different Colors in the designs to tell your machine to STOP at a certain points – once again, to ensure the design is joined in the correct order If your machine shows a different number of colors, or stitches in a different order than our Instructions, PLEASE RE-DOWNLOAD your files, and transfer to your machine WITHOUT opening in Embroidery Software. Similarly if your machine has an option to Smart Color Sort, then PLEASE TURN THAT SETTING OFF - These designs MUST STITCH out in the original order we created them. |
OK - You've got the Materials, you have the Files - What Now?
|
The following information will ensure you get a perfect stitch out STOP MOVEMENT WITHIN YOUR HOOPMany of our Large Appliques are quite stitch intensive, so it's important not only to use the correct Stabiliser, but to also minimise any stabiliser movement within the hoop. In many of my earlier designs, you will see that I have 'tape' around my hoops - There is a reason for this. Watch Kay's video showing how you can add tape to your hoop, to minimise any chance of your stabiliser moving while you are stitching your design.
|
You've finished the Embroidery - What Now?
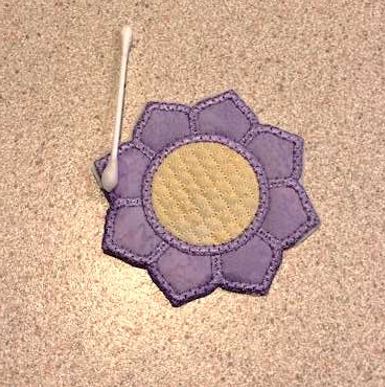
FINISHING - SATIN STITCH COASTERS/BOOKMARKS WITH WATER SOLUBLE STABILISEROnce you've completed your Coasters, you cut away the excess Water Soluble Stabiliser, but there will still be a small amount of Stabiliser left around the edge. Generally I do not completely wash out all the Stabiliser – I use a Cotton Bud/Q Tip and warm water to dissolve the Stabiliser on the edges.
If you use a steam iron, or too much water on the edges, because there is still Water Soluble Stabiliser left inside the design, it will shrink up! All is not lost - Put the item in the washing machine which will remove ALL the Stabiliser, then you'll be abe to press it back to its right shape |
If you've got to here - Good on you!! I hope we have explained how you can confidentally stitch our In the hoop Designs. Like any technique, the first one might take a while, and it might not be perfect, but you certainly learn from it.
Already addicted to In the hoop designs? Here's a few quick Links
- IN THE HOOP DESIGN CATALOG
- In the hoop Step-by-Step Videos
- Be Inspired by the stunning Items made with our In the hoop Designs
