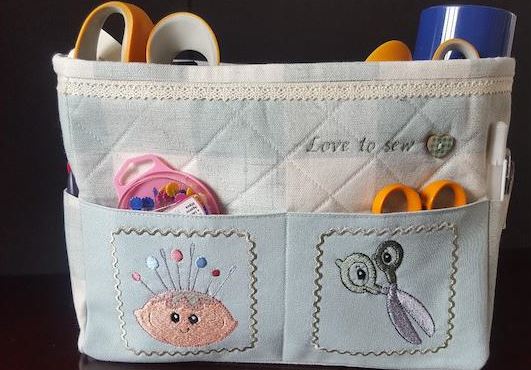
How To Make a Sewing Caddy

Make a Sewing Caddy for your useful sewing items. Keep them to hand, or, make it easier to move to your various work stations.
- Could also be used for make-up, hair brushes & straightens, or, just a general tidy caddy.
- I have used Cotton Canvas in this project but any fabric with a little substance is good.
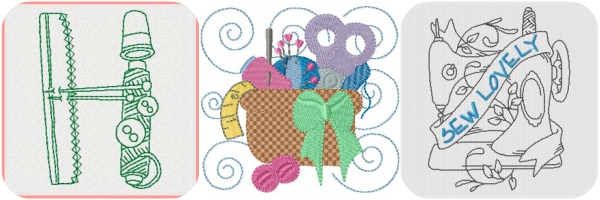
- See below to Download FREE Sewing Friends Designs
- Scroll down to view/download Printable instructions including Cutting/material List
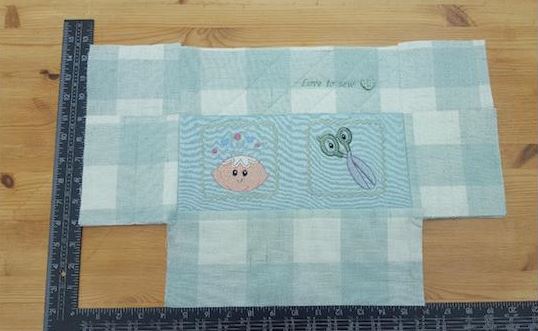
STEP 1
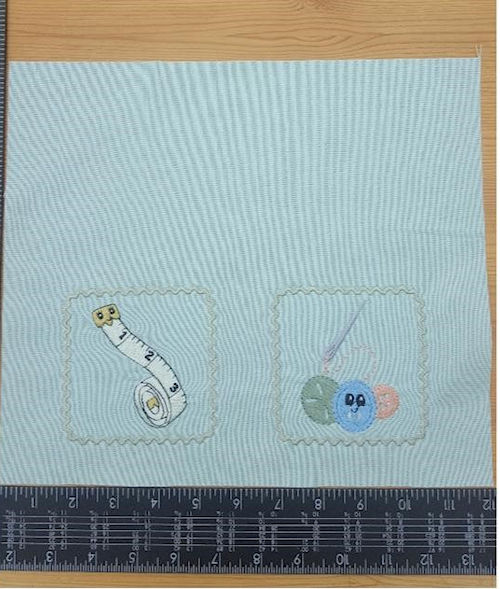
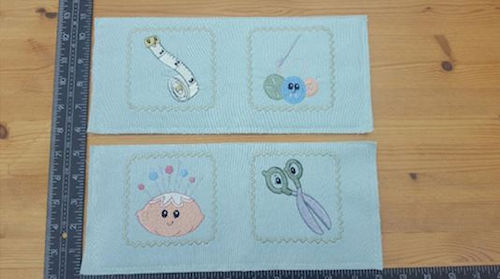
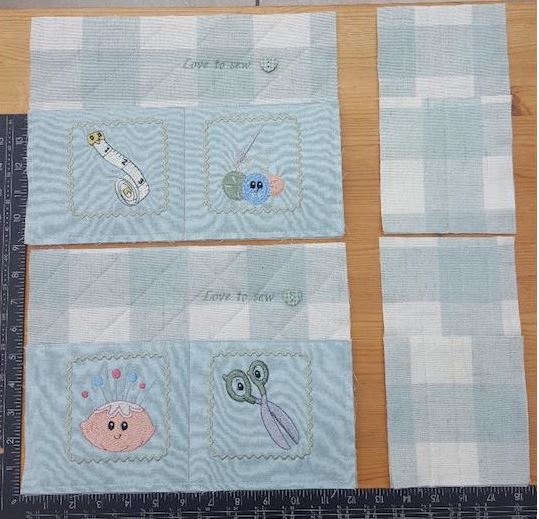
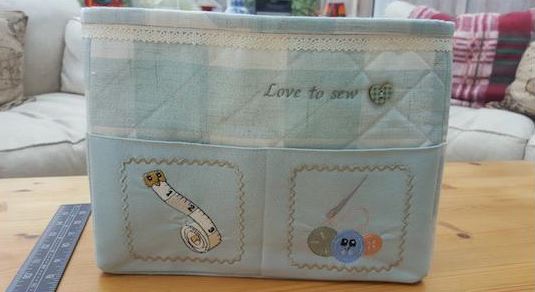
Take pattern pieces D (Front and back outside pocket pieces).
If using an embroidered design you will need to hoop up a larger than needed piece of fabric. I used a piece 13” x 17” to fit a large hoop, as I had programmed 2 designs together, but this is up to you and the patterns you choose. You could just use a patterned fabric, if you don't have an embroidery machine.
If an embroidered design is chosen, make sure you mark where you wish to place your design on the fabric and that you hoop as close as you can to the edge, the pocket piece will be folded in half.

STEP 2
Once embroidery design is completed, trim pocket panel to given measurements
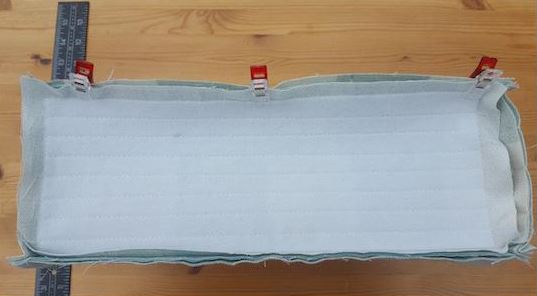
STEP 3
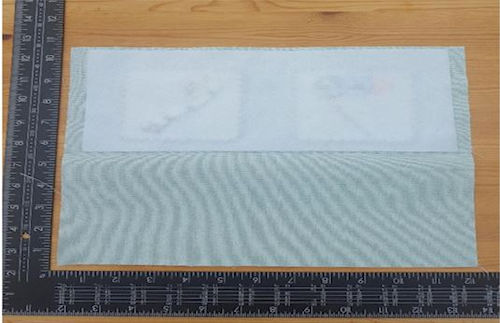
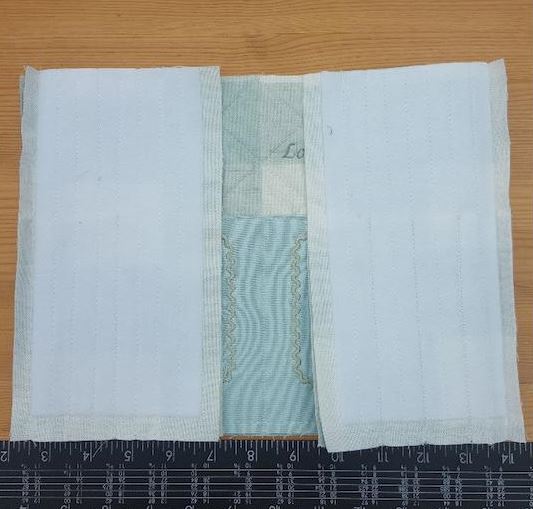
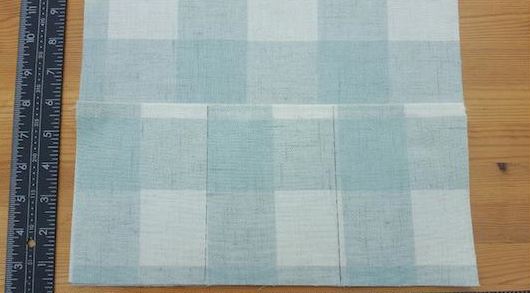
Place the fusible fleece on one half of the pocket panel. Fold the panel in half wrong sides together and press well.
Top Stitch along the folded edge & Tack down the sides and along the bottom to hold everything in place.
Repeat for both pockets.
STEP 4
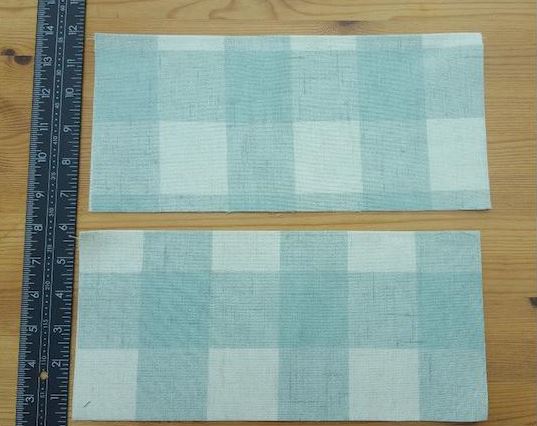
Repeat Step 3 on the 2 side pockets - Panels E
Place these to one side, for later.
STEP 5
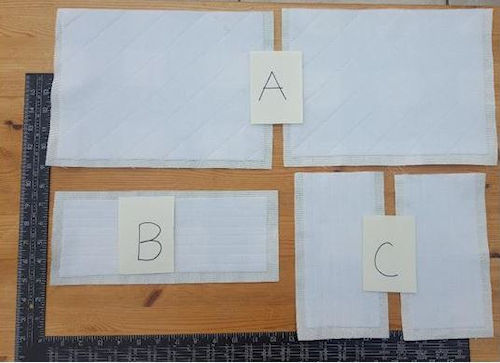
Cut out the panels for the outside of the Caddy. Panels A, B & C.
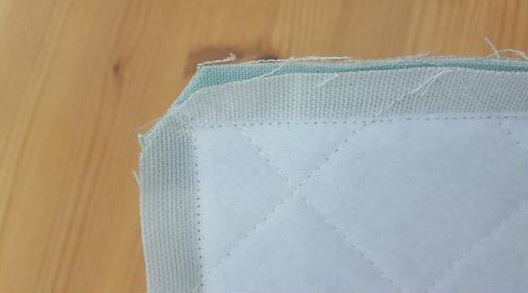
Attach the Fusible Fleece as follows. Attach leaving a half an inch boarder down the sides and along the bottom of panels A & C and a half an inch border all the way around Panel B. This helps cut down on the bulk in the seams.
STEP 6
Quilt all panels. I used 1.5” Cross Hatch on Panels A and 1” lines on Panels B & C. Quilting the panels will add to the structure of the caddy.
STEP 7
Attaching Pockets to Front,Back & Side Panels.
Take Panels A & C and with right sides facing up, place the pocket panels, you completed earlier.
With the bottom and side edges of each matching the bottom & sides of the main panels.
Find the centre of each pocket and draw a line down each pocket. This will be your sewing line to make the 2 individual pockets and also attached the pocket to the panels. I did do further sewing lines on one side panel, which made good pen pockets.
Tack the sides and bottom of each pocket just to hold it in place.
STEP 8
Making up the Outer Caddy.
Take a Panel A and with right sides together, attach the 2 panels C to either side. Using a 1/2” seam allowance sew down each side leaving a 1/2” open at the bottom. This helps when adding the bottom section.
STEP 9
Attach Bottom Panel B to the bottom of Panel A using a 1/2” seam allowance. Remember to leave 1/2” at each end open.
STEP 10
Now join with right sides together the other Panel A to the sides and bottom as just completed in steps 8 &9
STEP 11
Join the sides of the caddy to the sides of the bottom. Using a 1/2” seam allowance, pinch the sides together and sew a seam butting your stitches up to the other seams running down the sides.
STEP 12
Now trim some of the bulk from the corners of the bottom and turn right sides out. Press well
STEP 13
Making up the lining
Place outer Caddy to one side as we turn to the lining of the Caddy.
Fold in half, wrong sides together, each Lining Pocket panel F making rectangles of 12” x 6” Top stitch along the top edge.
STEP 14
Place each pocket on the Lining Panels A and draw a line 4” from each side down each pocket to make 3 individual pockets. Sew down each line as we did on the outer bag. Tack down the sides and along the bottom of the pockets just to hold in place.
STEP 15
Now repeat steps 8 to 12 to complete and make up the lining. Please use a 5/8” seam allowance on all seams always on the lining. It works I assure you, something to do with engineering and construction! So I am told.
STEP 16
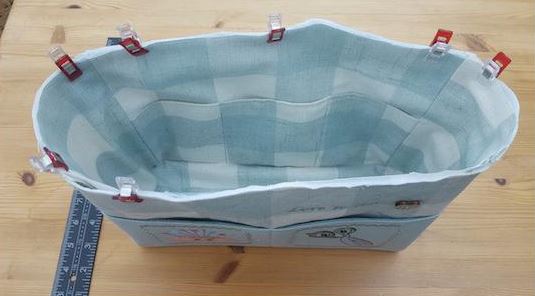
With wrong sides together, place the lining inside the outer Caddy.
Pin or clip around the top edge and tack in place. You may need to trim some fabric, from the lining, so it fits perfect in the depth.
STEP 17
Now we add the Binding around the top to finish.
Take your long 2” strip and place, right sides together, around the top of the outside of your caddy matching the top edge with the long edge of the strip. Using a 3/8” seam allowance sew all the way round to attach the strip, but also attach the lining to the outer of the caddy.
Press attached strip over the seam just made and turn under the raw long edge. Slip stitch to the lining on the inside of the caddy.
STEP 18
Press well and fill with all your goodies