
How to make a Crazy Patch I-Pad Pouch
How to make an I-Pad Pouch
Want to know how to create a unique, personal, but very very practical gift?
Darina shares how she makes her I-Pad Pouch.
DOWNLOAD PRINTABLE INSTRUCTIONS
As a Mother of Teenagers, I know, this has to be the 'coolest' Gift you can make them.
Use some licensed fabric, or a combination of colors they like, add their name or initial, and you have such a unique gift, plus, it will help to protect their 'must have' devices.
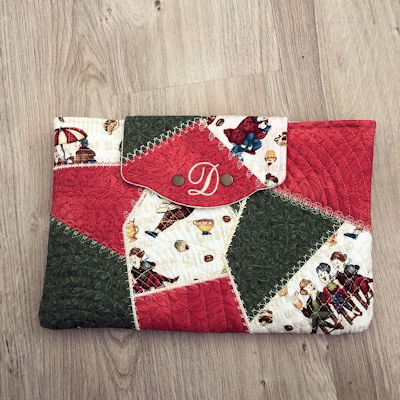
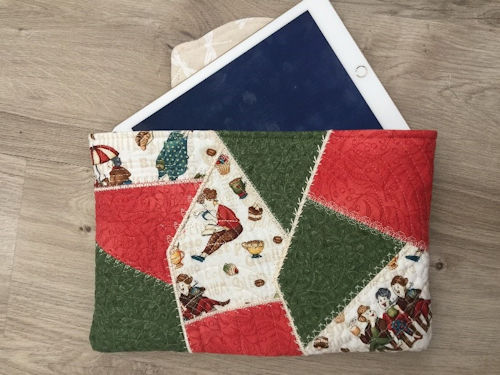
Ipad Pouch
Completed Size 13” wide by 8.5” high
(33cm x 22cm)
Materials:
- Scraps for crazy patch
- Lining - Cut two 14 by 10 inch pieces
| If you don't already have these designs, to save you from purchasing two designs, we have put together a 'combo' set for this Blog
This Combo set includes |
now back to Darina
To create this Ipad pouch I used two Kreative Kiwi designs then stitched them on my sewing machine.
To begin I made two large A5-(6x10 size) Crazy Patch Notebook Covers, omitting the end flaps. and initial
Crazy Patch Notebook Design Files
|
I then made one personalised flap from the Crazy Patch Clutch Purse (5x7 size)
|
Clutch Purse Files BAGFLAP-5X7 - and initial of your choice |
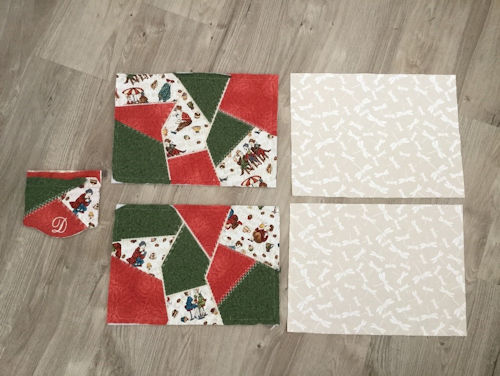
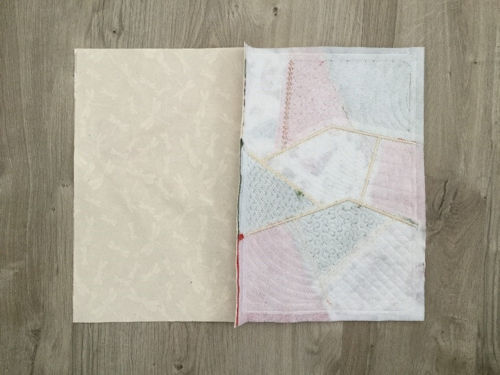
I have then re-cut the two pieces of lining to match the notebook cover.
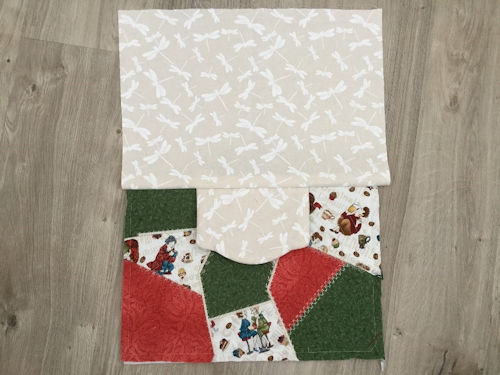
Next step is to lay your flap face down on the back panel centred at the top edge. Lay your first lining piece on top face down and stitch across the top, ensuring to stitch far enough down to accommodate the design on the notebook cover.
Open out flat and press.
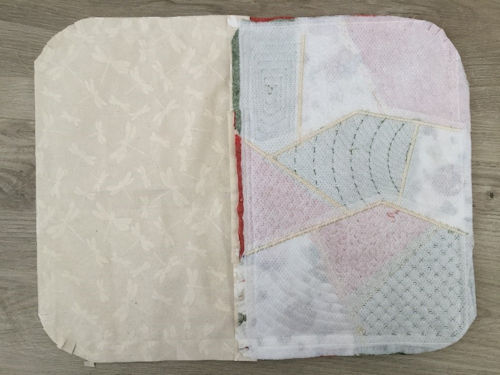
Repeat for the second piece minus the flap.
Now lay your two pieces with right sides together, matching the seams.
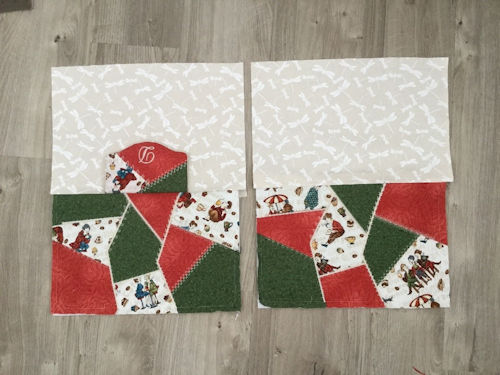
Stitch together leaving an opening on the bottom or side edge of the lining to be able to turn through.
I have curved the bottom corners. Also make sure your seam is deep enough to cater for the design on the notebook edge.
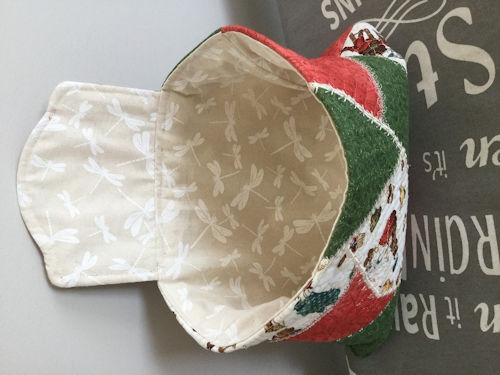
I found I needed to stitch the lining a little bit shorter so there was no excess when all turned through.
Clip all the curves, pull through and just top stitch the opening closed.
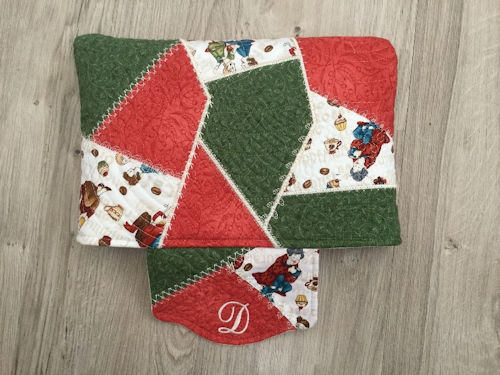
I have then chosen to top stitch around the top edge of pouch, and along the edge of the flap, changing my threads at each point so they match the fabric (I used my embroidery threads to do so).
All finished. As my ‘D’ took up the central spot I chose to put two Kam Snaps on instead of one. Opens and closes very easily.
Note from Heather
Thanks so much for sharing your talent Darina
This is such a versatile idea!!
If you don't have a 6x10 hoop, you can still make this I-Pad Pouch
The finished size of the 6x10 Crazy Patch Notebook Panels is 13.95 by 9.45 inches -lets round that to 14 inches by 9.5 inches
Therefore, cut two Front/Back and two lining pieces to that size, add any embroidery design of your choice, (and batting) then add the Crazy Patch bag flap and complete as per Darina's Instructions
I can't wait to see what you create!!
