Pam Shows How to Make a Beautiful Christmas Wreath from a Simple Leaf
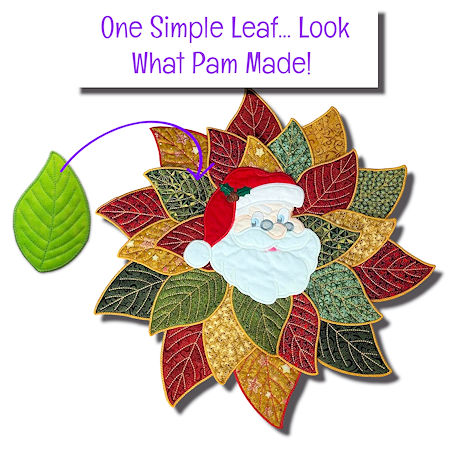
Make a Beautiful Wreath with a simple Leaf
Sometimes our customers take a Kreative Kiwi design and use it in a way we never imagined – and this beautiful wreath created by Pam is a perfect example!
Pam used our embroidered applique leaf design in gorgeous Christmas fabrics to create this stunning layered wreath, then added Santa to the centre for the perfect festive finishing touch.
Best of all, it's surprisingly simple to put together!
What Pam Used
For her wreath, Pam stitched Leaves from our $1.00 Leaf and Clump set
-
10 Large Leaves (6x10)
-
14 Medium Leaves (5x7)
-
A 15 inch circle of foam board
-
Fabric glue
-
Velcro
-
Large Santa embroidery design for the centre
Of course, you could change the number of leaves depending on the size of your wreath and how much overlap you would like.
How Pam Made Her Wreath
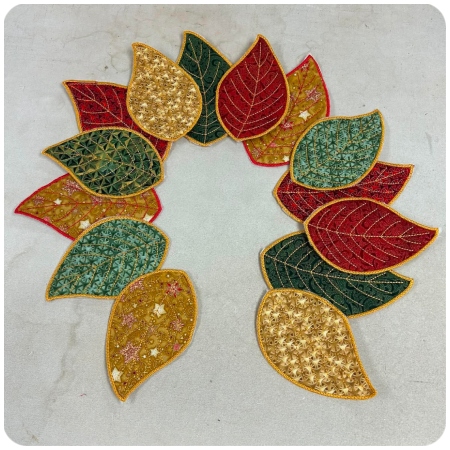
Pam started by stitching 10 of the large leaves and 14 of the medium leaves, choosing a beautiful mixture of traditional Christmas reds, greens and golds.
The different fabrics and quilting patterns make each leaf slightly different while still working beautifully together.
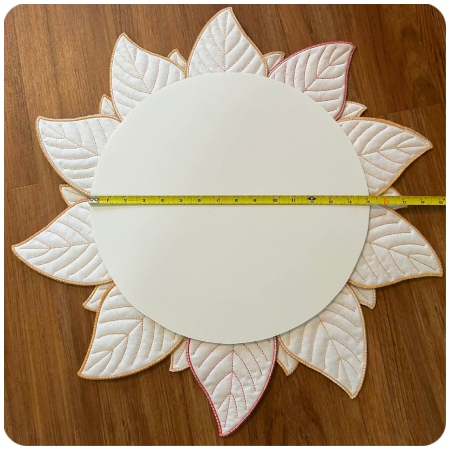
She then cut a 15 inch circle from foam board.
To help keep everything evenly positioned, Pam marked another circle approximately 2 inches in from the outside edge as a guide.
Add the Leaves
The large leaves were arranged around the outside of the foam board circle, overlapping them to create the first full layer.
Next, she arranged the 14 medium leaves in another overlapping row around the wreath.
This second layer fills the centre beautifully and gives the finished wreath that gorgeous full, dimensional look.
Once Pam was happy with their placement, she simply used fabric glue to attach them to the foam board.
And Then Comes Santa!
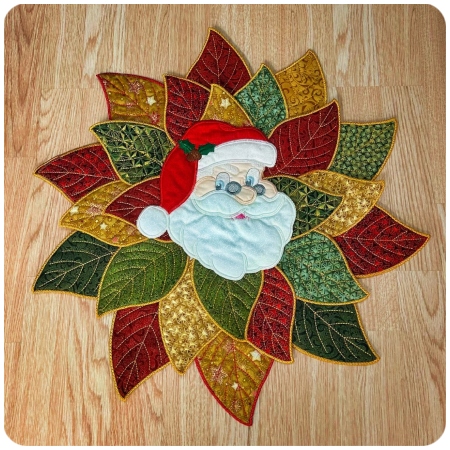
Pam added our Santa design to the centre – but here's the clever part...
Santa isn't permanently attached!
She used Velcro to temporarily attach him to the wreath.
That means she can remove Santa and replace him with another embroidery design whenever she wants.
What a great idea!
You could create different centrepieces and use the same embroidered wreath again and again.
Make It Your Own
Pam's wreath is a wonderful example of how you can take individual embroidery designs and turn them into something completely different.
Imagine changing the fabrics and centre design for different occasions:
Autumn colours with a pumpkin in the centre
Orange, purple and black for Halloween
Pretty florals and pastels for Spring
Easter fabrics with a bunny in the centre
Or traditional reds, greens and golds like Pam's beautiful Christmas version.
You could even change the centre design throughout the Christmas season.
A huge thank you to Pam for sharing her beautiful wreath with us – and for sharing how she made it so we can all be inspired!
We absolutely love seeing the creative ways you use your Kreative Kiwi designs.