How to make a re-useable Shopping Bag by Kym

FOLD UP SHOPPING BAG – INSTRUCTIONS
by Kym
Kym very kindly shared her Instructions for making the popular re-useable Shopping Bags that you can keep in your handbag and un-fold when you need them.
Thanks so much Kym
MATERIALS:
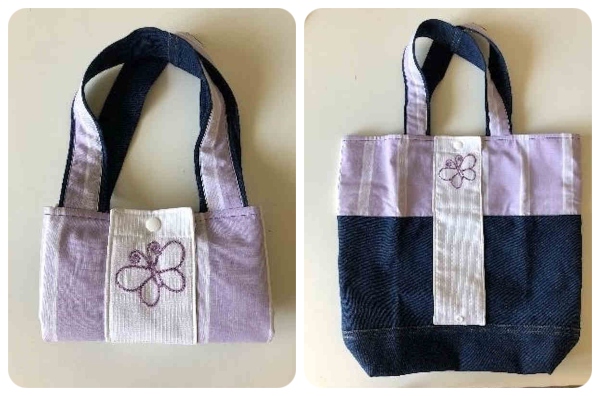
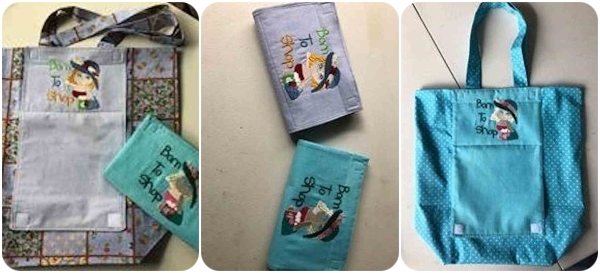
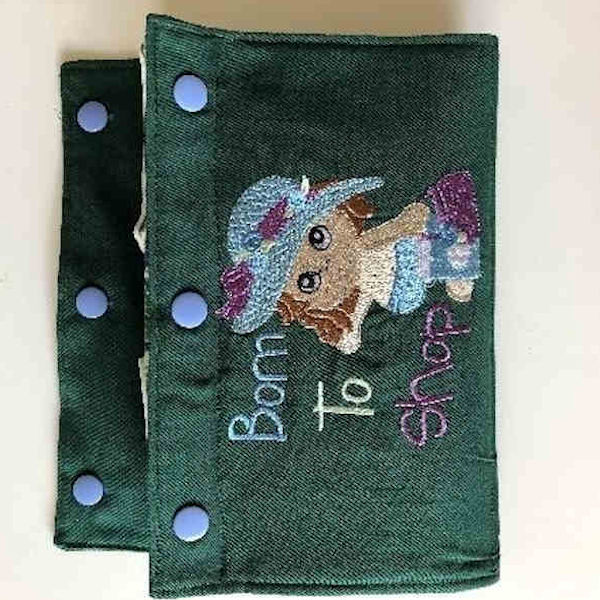
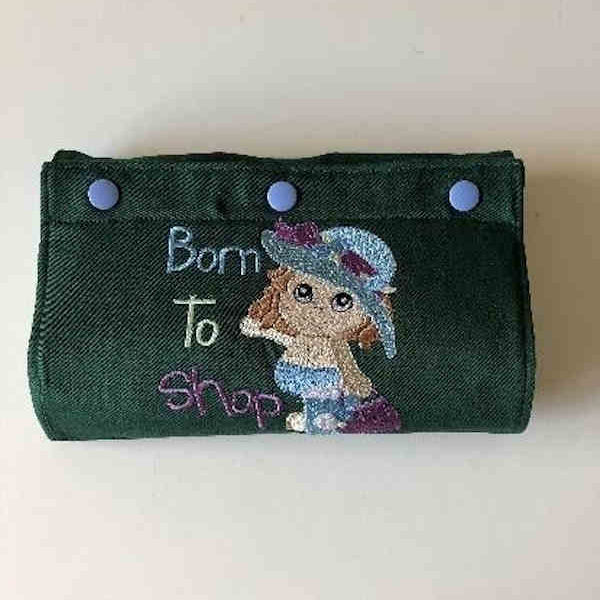
- Kreative Kiwi Free “Born to Shop” Design
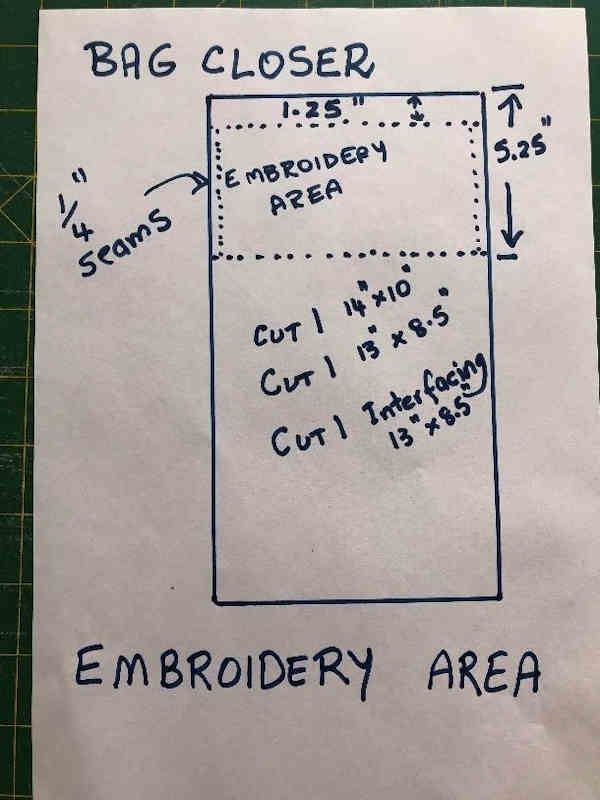
Materials and Cutting guide:
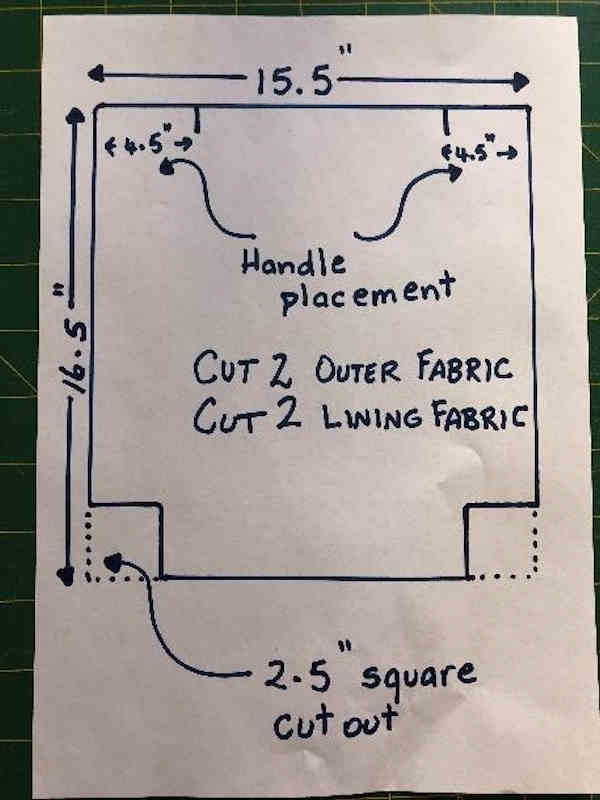
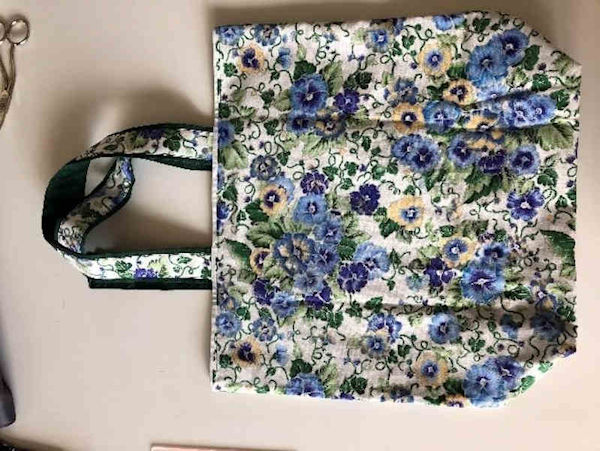
- Outer fabric – cut 2 pieces 15.5” x 16.5”
- Lining fabric – cut 2 pieces 15.5” x 16.5”
- Handles – cut two of each Outer and Lining 17.5” x 3”
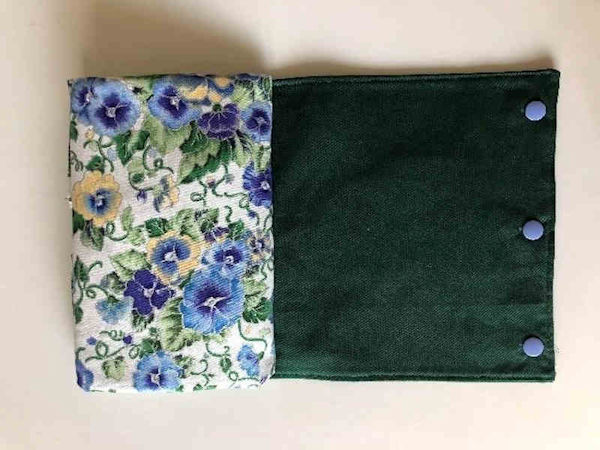
- Bag closer – cut one (in this case lining fabric) to be embroidered 14”x10”
- Bag closer – cut one (in this case lining fabric) 13”x8.5”
- Bag closer – cut one interfacing 13”x8.5” (If you are using denim or a really ‘heavy’ drill for e.g. you can probably do without the interfacing, however since I use Kam snaps I always put the interfacing in)
- Kam snaps or Velcro
16.5” measurement is the height of the bag
¼” seam allowance throughout
PATTERN AND PLACEMENT LINES:
METHOD:
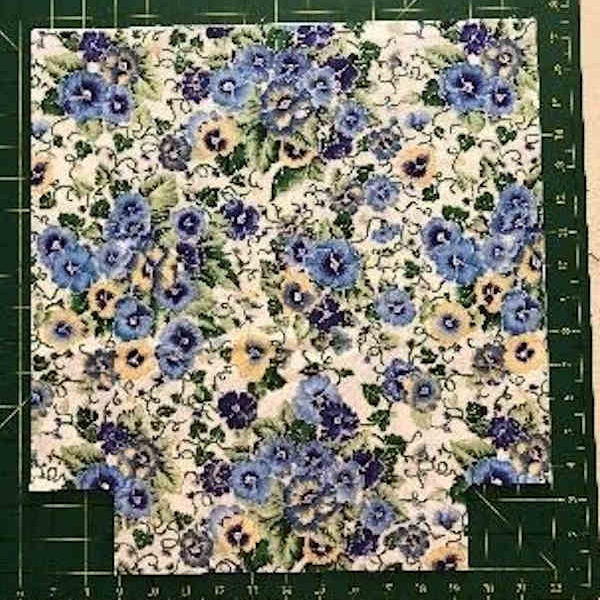
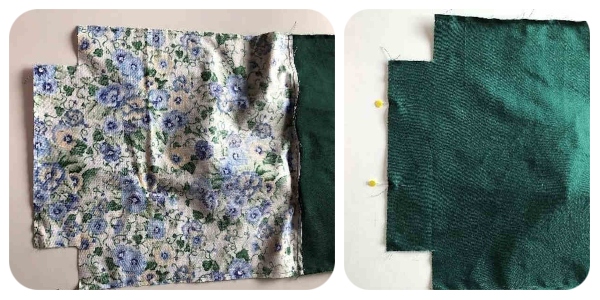
- Cut 2.5” square ‘bites’ out of each bottom corner on both outer and lining fabric pieces and set aside.
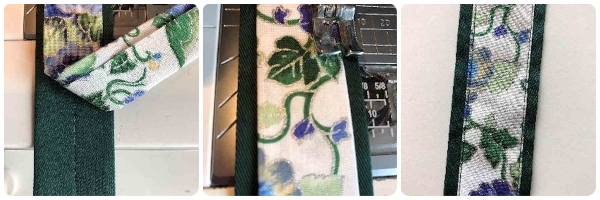
- Prepare Handles –
- Press the Lining Fabric Handle pieces – lengthwise raw edges to the centre. It should end up approximately 1.5” wide.
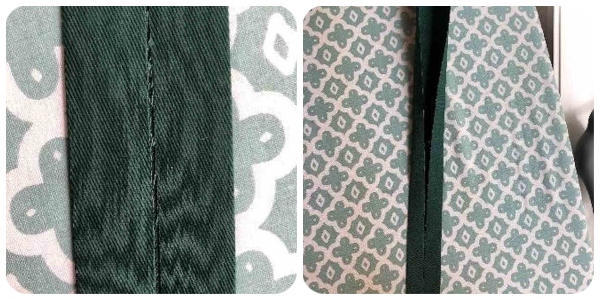
- Press the Outer Fabric Handle pieces – lengthwise overlapping as shown – once pressed there will be approximately ¼” from one folded edge to the raw edge as pictured. It should end up approximately 1 and 1/8” wide
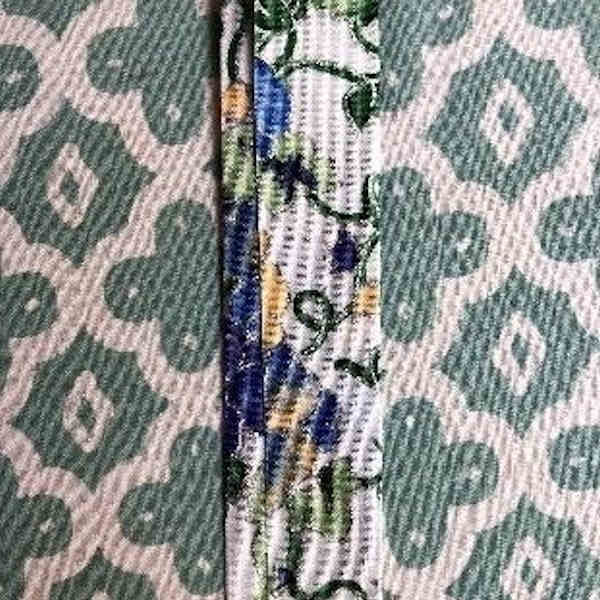
- Lay the smaller, patterned handle piece over the lining fabric handle piece centred so that there is a ‘border’ either side as pictured. Pin stitch down each long side.
3 Position Handles and Stay Stitch – pin handles in place along the top edge of the outer fabric (4.5” in from the edge on each side), then stay stitch in place.
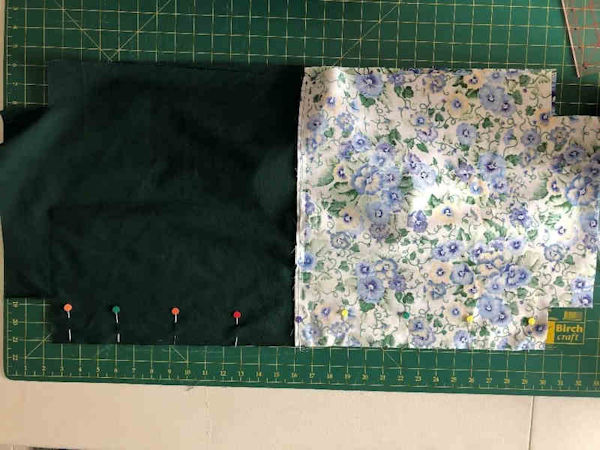
4 Stitch Linings to Outers along the top edge (Handle edge)

5 Open out seam and run a stitch line on the lining side stitching through the seam allowance – this will make turning the lining to the inside very easy.
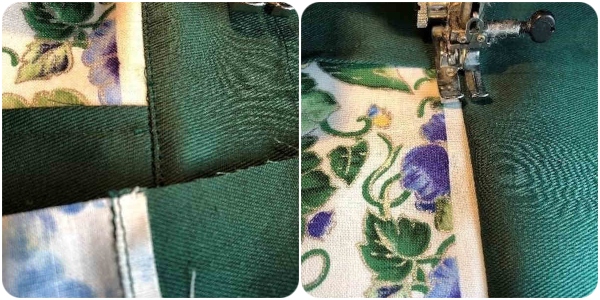
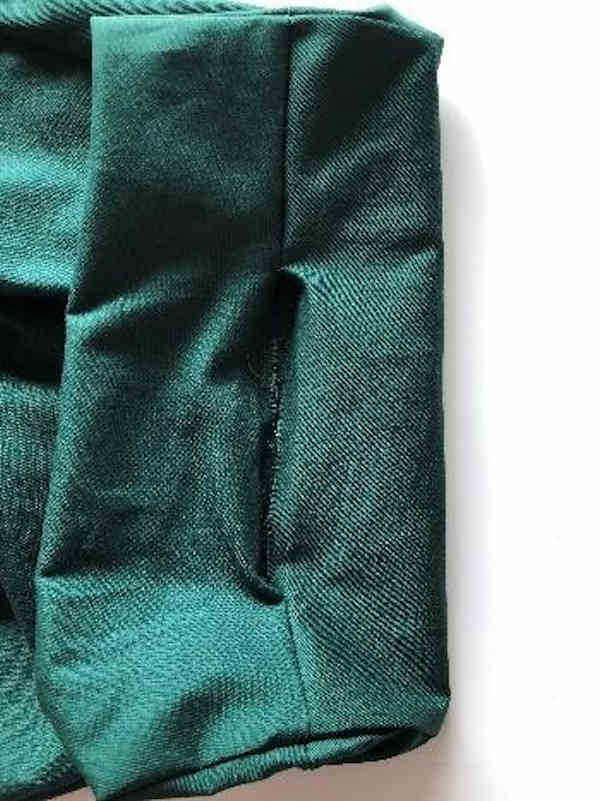
6 Now stitch the two – front and back together along the long sides
7 Stitch right across the bottom of the outers. Then stitch the bottom of the lining leaving a gap for turning (5-6” is usually enough, if you are using very heavy fabric you may want to leave a little more)
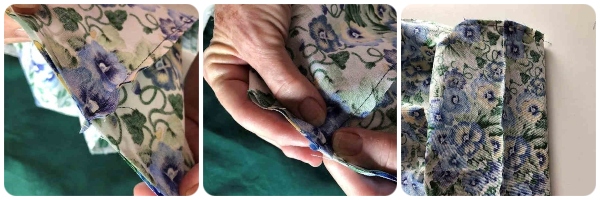
8 Now for the corners – on each of the four corners, ‘pinch’ up so that the side seam matches up with the centre bottom seam flipping the seam allowance either way as pictured. Then stitch fold to fold with ¼” seam. Not the easiest thing to explain, hopefully the pictures will help.
9 Now turn through to the right side and stitch up the opening in the lining. I am very lazy and machine stitch the opening, but if you want you can hand stitch closed.
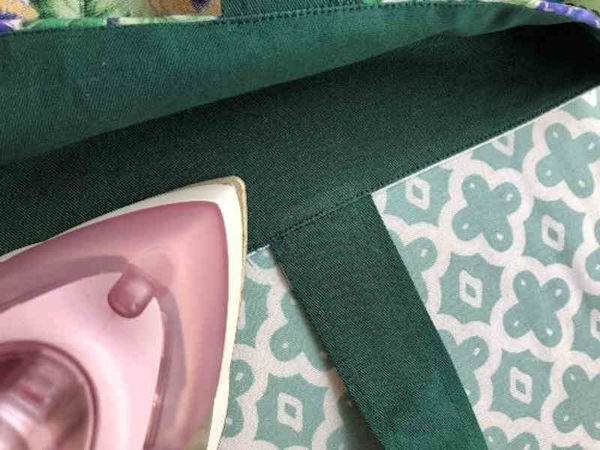
10 Back to the ironing board and press the lining to the inside – press along the top of the bag – here’s where the extra stitch in step 5 comes in handy. Once pressed, top stitch ¼” along the top edge.
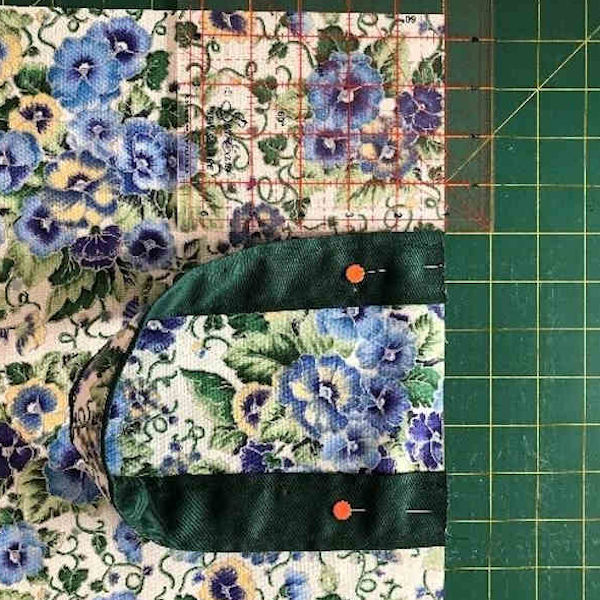
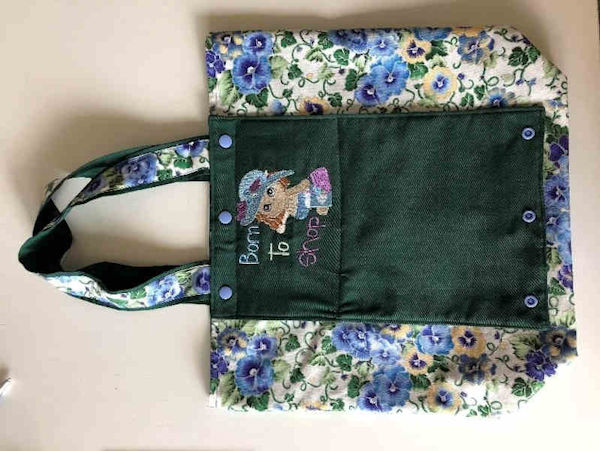
11 Now the basic bag is complete you need to prepare the “closer”.
First complete the embroidery design. I cut the fabric a little larger than required to allow room for hooping. The following shows the embroidery area, so depending on your machine and how you can manipulate the positioning of the design, hoop your fabric accordingly.
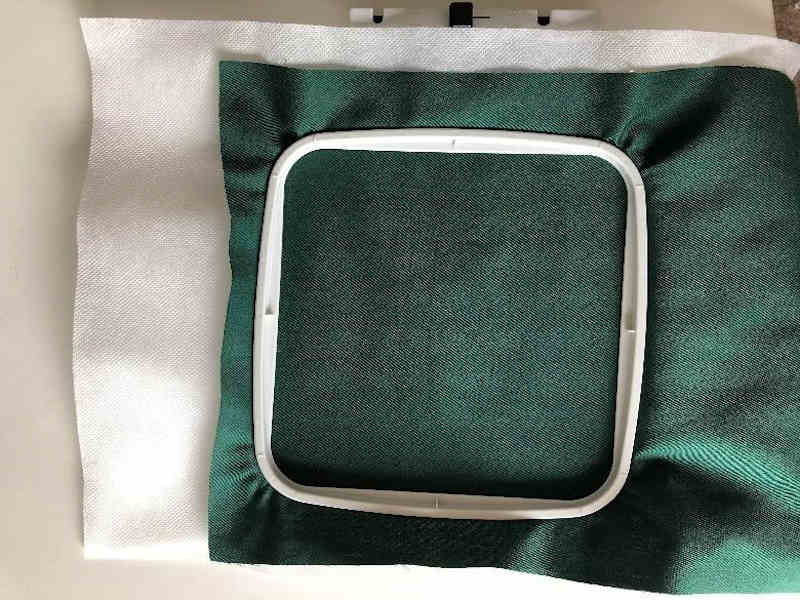
For my machine, I hooped with around 1” of fabric showing at the top of the hoop and centred otherwise in the hoop.
For the Born to Shop design I moved it as high as I could on the hoop area. If you are concerned about placement, allow more ‘wriggle’ room when cutting the fabric and then recut to size, as per the cutting guide.
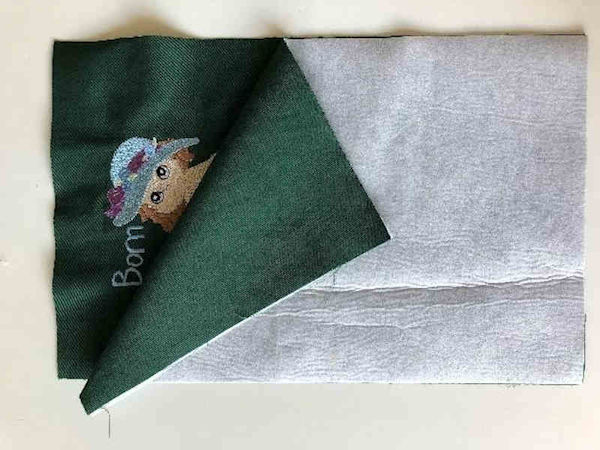
12 Now recut Embroidered piece to size (13x8.5), keeping in mind the embroidery area – this is really important so that there is room at the top for the snaps or Velcro and also the stitch line under the embroidery aids in the folding of the bag – will become clearer when you are finished.
13 ‘Sandwich’ the two fabric pieces, right sides together along with the interfacing if you are using it. Stitch right around the edge leaving a gap for turning
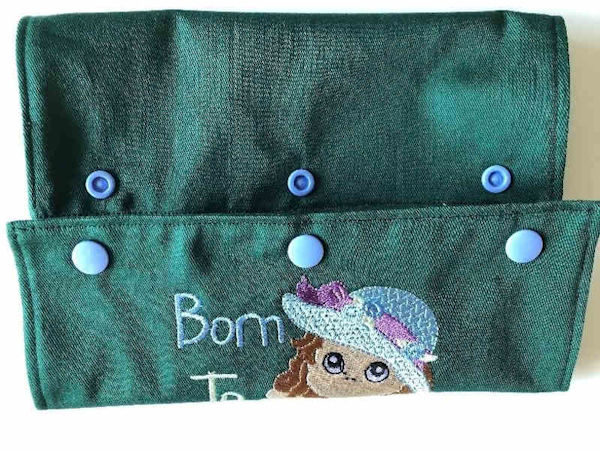
14 Turn to the right side and ‘pin stitch’ right around the edge being sure to catch in the open edge.

15 Apply Kam snaps or Velcro top and bottom remembering that the bottom goes around the back and tucks under the top flap.
16 Now stitch to the front side of the bag. Line up the top edges of the bag and closer, stitch along 1” (no less) from the top edge, down one side 4” (or 5” from the top edge), across to the other side, and then back up to meet the start of the stitching. If necessary you can use a zipper foot so that the snaps don’t get in the way of the foot.
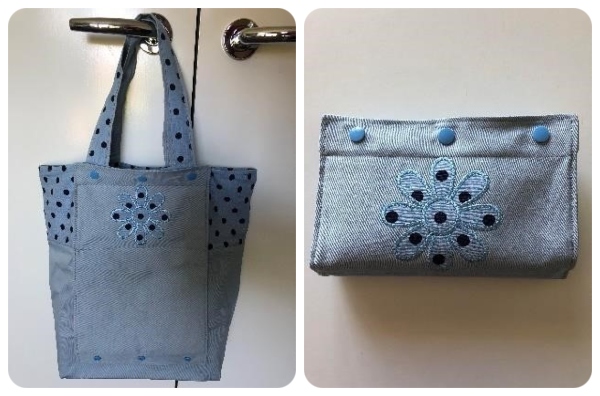
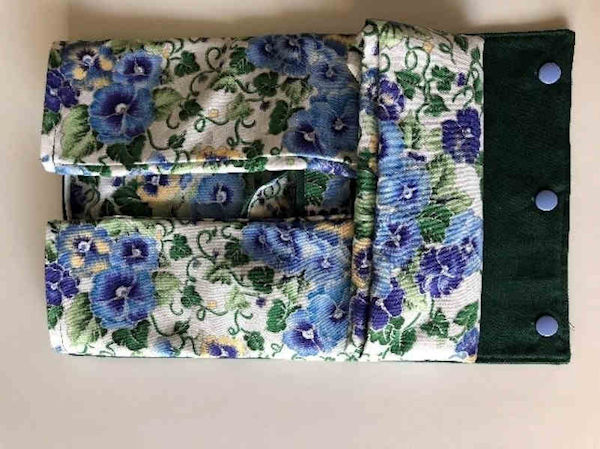
17 Finished Stitching! Now to fold. Turn to the back, fold base in, fold in handles, fold sides into the centre, fold up from the base in two steps, wrap closer around to the front, secure with snaps or Velcro.
1 – Tuck up base
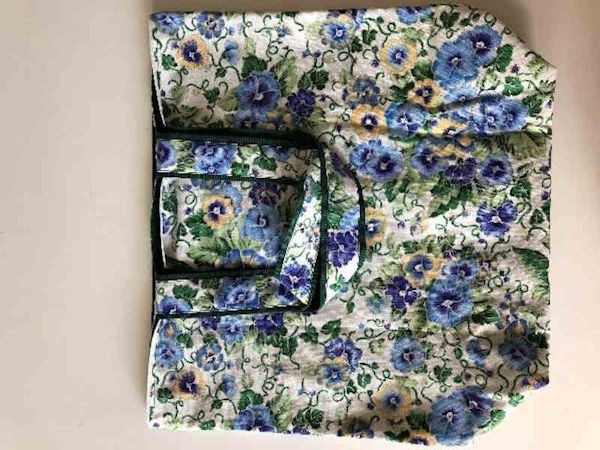
2 – Handles in

3 – Sides into centre
4 – Fold up from the base
5-Flip, wrap and clip
EXTRA INFO!
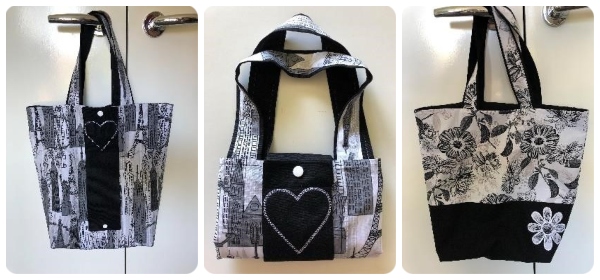
I found when using denim (I recycle jeans a lot!) the added bulk of the handles etc meant that the whole thing was a little bulky to put totally inside the ‘closer’. So… I just made my closer narrower and don’t fold in the handles – works quite well and looks cute too! I cut the closer in this case 13”x3.5” – all other instructions remain the same.
Also have fun with mix and matching fabrics – they don’t have to be solid colours etc, and placement of the embroidery is fun to play with as well – hope you enjoy making them as much as I do.