How to make a Sewing Machine Cover

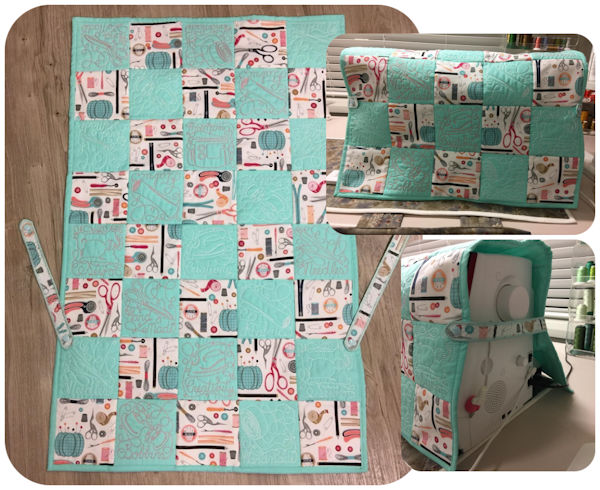
Darina has done it again! Here she shares how you can spruce up your Sewing Room with not only a pretty cover for your Machine, but a practical mat (which stops machine vibration) with handy snap on pockets to hold your bits and pieces
The beauty of this set, is you can make it to fit your own Sewing Machine.
So off you go and measure your Sewing Machine to get the correct measurements for your machine
MATERIALS
|
There are too many variables to give you exact Fabric requirements - it depends on your machine size, but as a guide, Darina used 1.5 metres (1.5 yards) each of two matching fabrics - a total of 3 metres (3 yards) for the entire set - Sewing Machine Cover, Mat and Pockets In addition, you will need:
Optional
|
EMBROIDERY DESIGNS USED - FREE DOWNLOADS
 |
Blocks for Cover and Pockets Facebook 20000 Members Sewing Set Centre Applique Block Free Applique Sewing Machine Block Optional Side Straps |
CONSTRUCTION - MACHINE COVER
STEP ONE - MEASURE
Measure your machine to determine the width and height you want for your finished Front panel.
This measurement determines all your cutting requirements
As this version has bound edges, the finished size measurement is the exact size you need your Front and Back Panel to be.
You can choose any method to make this panel - one fabric, blocks or a combination of fabric and embroidery designs
- Green cover - all blocks
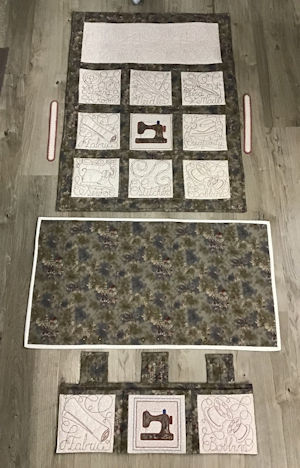
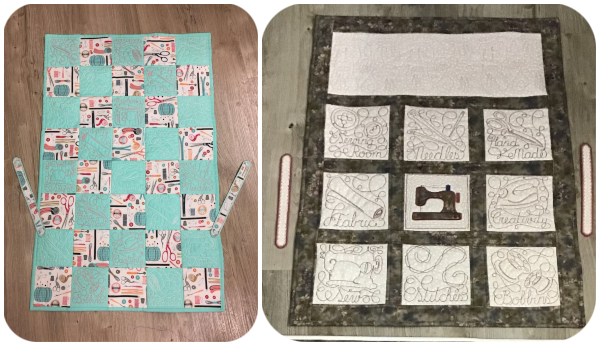
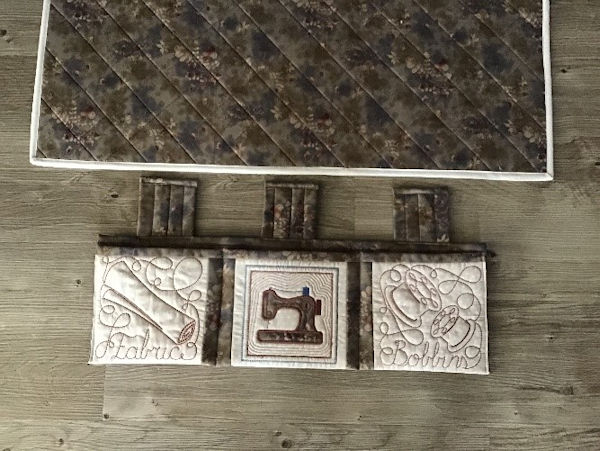
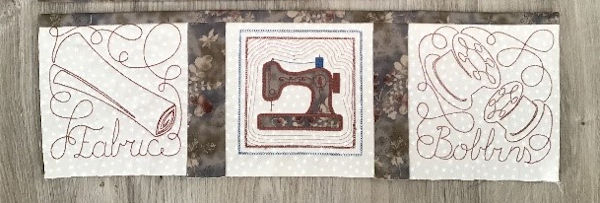
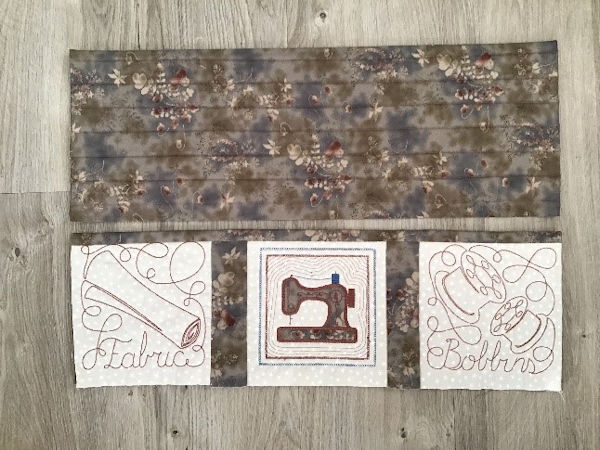
- Brown/Cream Cover - combination of blocks and embroidered panel
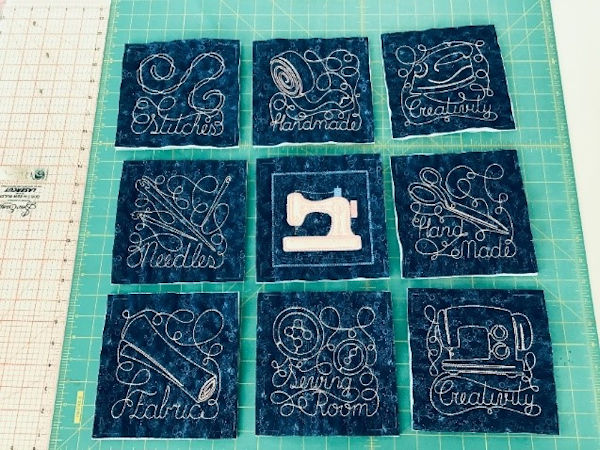
STEP TWO - EMBROIDER BLOCKS
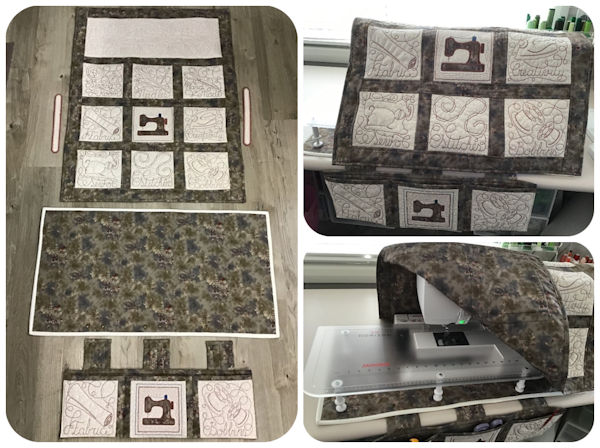
For the Brown/Cream Cover set Darina used the 6x6 Blocks
- Finished Size of Cover 36 x28 inch
- Finished Size of Sewing Mat 32 x17 inch - Sewing Machine with Table as shown
For the Blue Cover set Darina used the 5x5 Blocks
- Finished Size of Cover 35 x 24 inch
- Finished Size of Sewing Mat 23 x 15 inch - 'normal' sewing machine
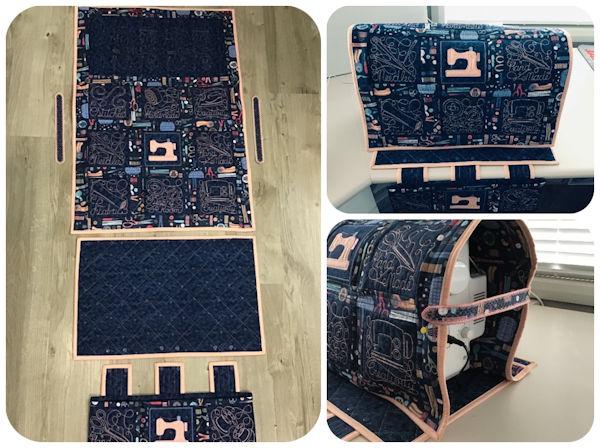
Decide on the block size you will use
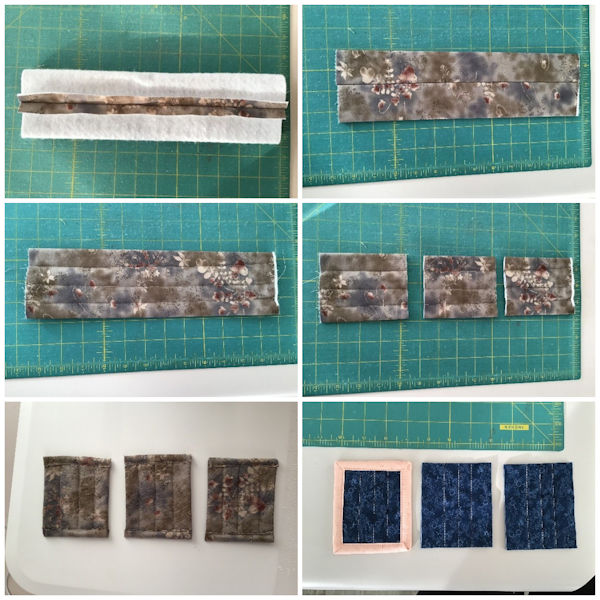
- Cut your fabric squares 2 inches larger than your chosen block size
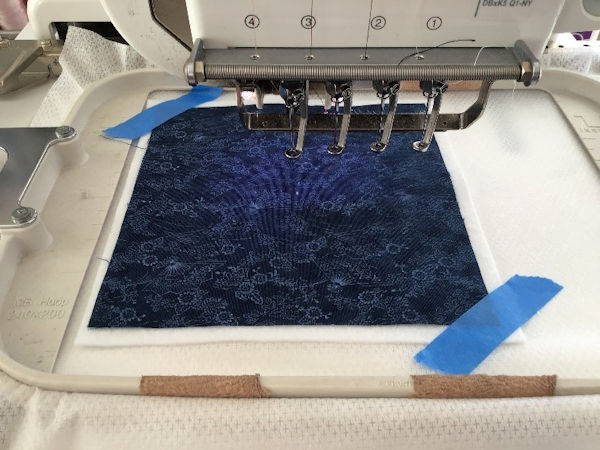
- Mark the centre
- Hoop Stabiliser
- Centre batting and fabric
- Embroider your chosen designs
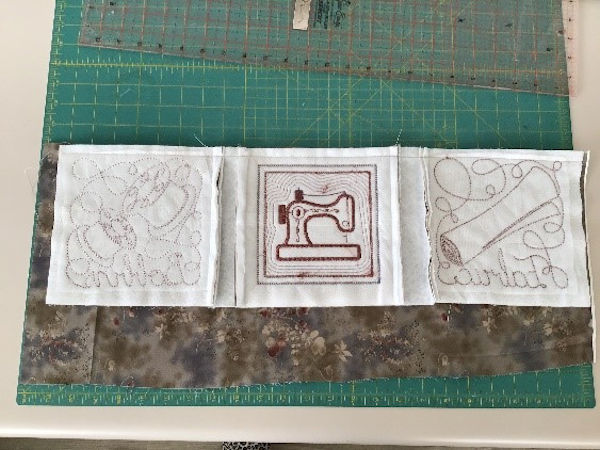
- Trim your blocks back to ½” out from the design. (Trimming your blocks accurately to the same allowance makes it easier for assembly)
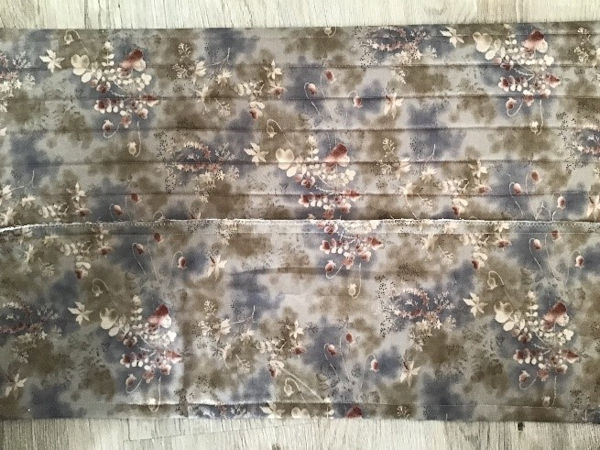
STEP THREE - ADD SASHING STRIPS
- Iron parlan or iron on interfacing onto your Sashing fabric
- Cut into 2.5inch strips then sew together with a ½inch seam on the internal sides of your blocks
- Trim completed panel so top and bottom edges are neat and straight
- Depending on your required measurements, you may need to add a sashing on either the top or bottom
- When you have your full length completed, add the sashings on both sides.
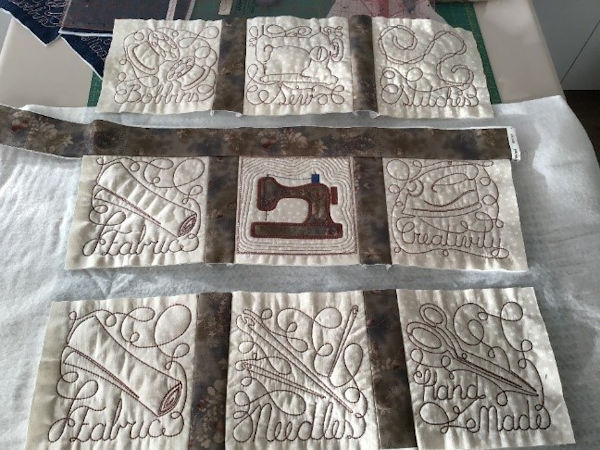

To make her Topper the required size, Darina added an embroidered block as pictured
STEP FOUR - OPTIONAL - WADDING/BATTING
If you have used embroidered blocks, then your top will already have batting. Its personal preference, You could add another complete layer of batting, or as Darina did, add a layer of flannel for just a bit more body
Cut your Batting slightly bigger then your finished front panel size
STEP FIVE - ADD BACKING
- Cut your backing about an inch larger to start with
- Pin the layers together (wrong-sides together) and if desired, quilt through all three layers
- Trim back to desired finished size
- Overlock or zig zag the outer edges and trim so it has a nice straight edge.
STEP SIX - BINDING
- Measure all 4 sides of your panel and make or purchase 2inch binding
- Attach binding to sides
Not sure about Binding? Click here to read Darina's Binding Blog which shows not only how to make your own Binding, but how to stitch your binding to your projects
STEP SEVEN - OPTIONAL - ADD TABS
- Download the Free Tabs Design Set (see Designs Used above)
- Embroider two large tabs to be added to the side of the cover if desired.
- Use Kam Snaps to attach.
- (Darina used 10 inch tabs - if you have a smaller hoop, you could make two for each side with a snap in the middle)
 |
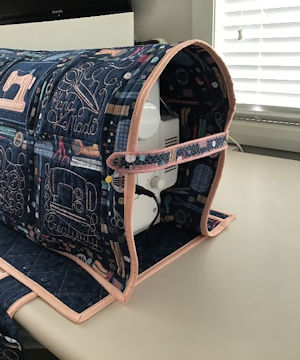 |
CONSTRUCTION - MACHINE MAT
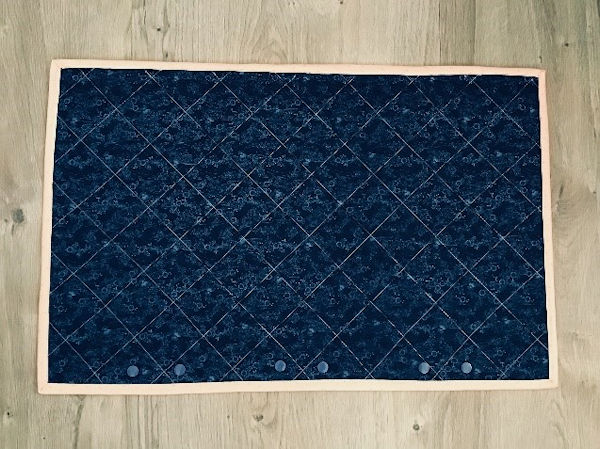
STEP ONE - MEASURE & CUT
Measure your machine Base (including table if required) to determine the width and length you want for your finished Mat
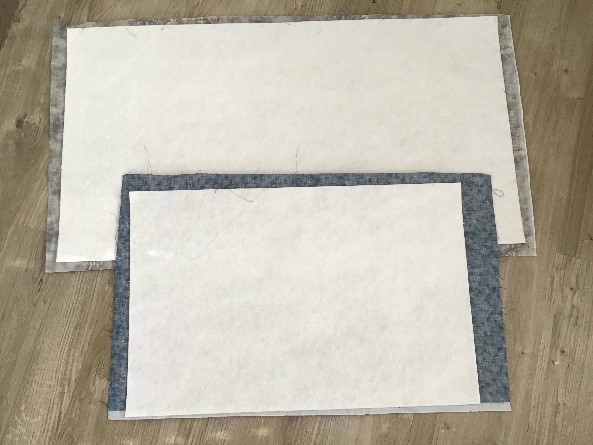
- Cut one piece of bag wadding to the exact size you want for your mat.
- Cut one piece of your top fabric and one of your lining about 2” larger.
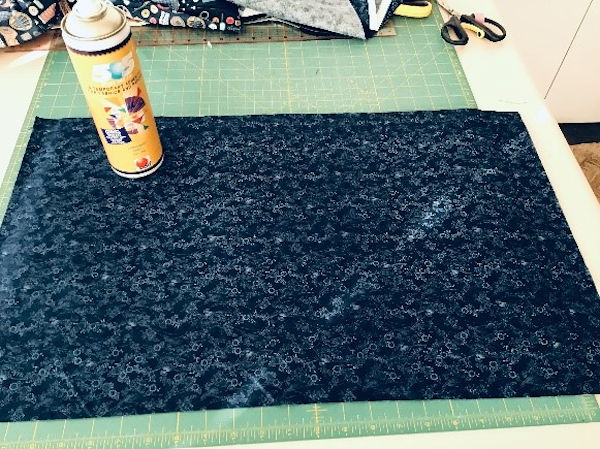
- Spray glue your top fabric to your wadding/batting
STEP TWO - QUILTING
- Mark your quilting lines 2” apart
Click here to read Darinas Quilting Blog which gives step by step instructions
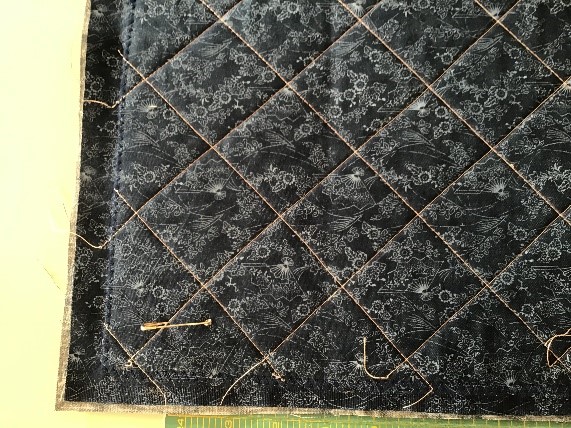
- Once the stitching is completed, turn it over and trim the fabric flush with the bag wadding.
STEP THREE - ADD BACKING
- Take your lining piece of fabric for the back.
- You can spray in place if you want.
- Overlock or zigzag right on the edge.
- Trim all the way around.
STEP FOUR - BIND
- Bind with matching binding to your machine cover.
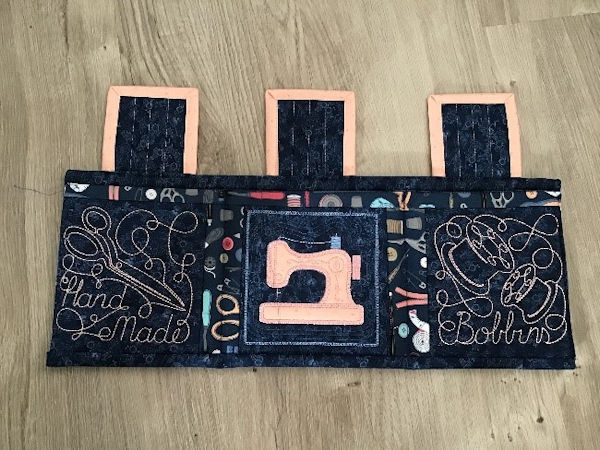
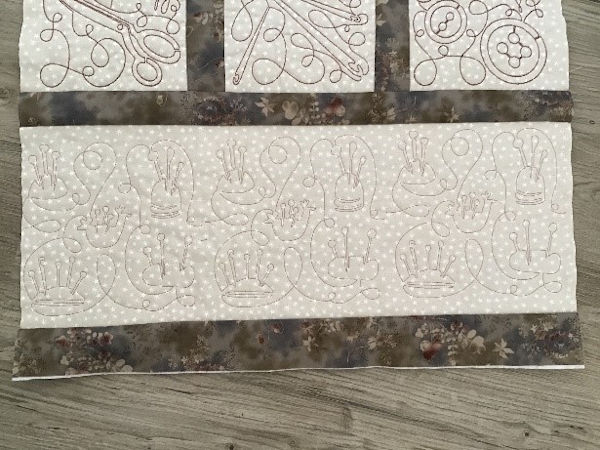
CONSTRUCTION - POCKETS
Create these practical pockets to add to your Sewing Mat - Attach with kam snaps, and you can add or remove them as you need
STEP ONE - EMBROIDERY
- Embroider three extra blocks of your choice
- Join the three blocks with sashing on the sides the same as the cover.
STEP TWO - MEASURE AND CUT
Measure your completed Pocket Panel
From your contrast fabric, cut a pocket Lining - the same width, add 2 inches to height
- Finished Pocket Panel (blocks and sashing) = 22 inch wide 6 inch high
- Add two inches to the height = 22 inch wide - 8 inches high
(The Lining is cut larger, to give the pocket its 'bound look' top edge, plus line the inside pocket)
STEP TWO - CREATE POCKET FRONT
The Pocket Front has fully encased seams along top and sides - the only raw edges are the bottom
To do this:
- Place Pocket Panel and Pocket Lining Panel with rights sides together stitch across the top with a half inch seam.
While still working from the wrong side, move the stitched edge down by an inch and fold (which will give you the bound edge)
Then stitch along the two sides with a 1/2 inch seam allowance
Turn the pocket to the right side, and you will have your neat bound top edge, with stitched sides - only raw edges the bottom
** You may need to cut off any excess Lining at the bottom edge to match your original blocks
STEP THREE - CREATE POCKET BACK
- The pocket back is created the same way, just 1 inch taller, so add 2 inches to the height of your earlier measurement. (There is a little wiggle room in this measurement) - You need a Front and Back Lining
- Darina used foam wadding as the batting for the back pocket - you can use any batting to give the back pocket body
- Optional - as you did with the sewing mat, you could spray glue your top fabric to your batting and pre-quilt your fabric - Darina stitched straight lines about 1.5inch apart
- Place your two pieces of front and Lining pieces right sides together, and stitch the top and both side seams as you did with the front pocket
STEP FOUR - STITCH POCKETS TOGETHER
- To stitch the pockets together, and keep the bottom seam hidden, place the right side of the front pocket facing the wrong side of the back pocket together.
- Stitch across the bottom seam and neaten the edge by overlocking or zig zag.
- Fold your front pocket up.
- Stitch very close to the edge on either side
- Stitch down the centre of the two internal sashings
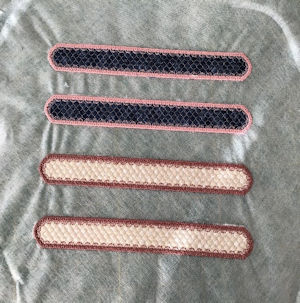
Pocket Tabs
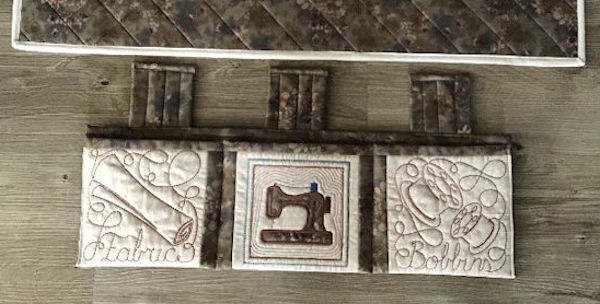
- Cut one piece of fabric 12” x 8” and back with parlan or iron on interfacing
- Fold in half with right sides together.
- Stitch down the side.
- Turn through with the seam being in the centre at the back.
- Topstitch three rows of stitching top to bottom
- Cut into 3 x 4” pieces.
- Neaten the ends as desired. I overlocked some or used some excess binding to finish them off. The top and bottom will not be seen from the top of your project.
- Sew one end at the top of the pocket bag, centering them as required.
- I have used Kam snaps to attach them to the machine mat so the pockets can be removable but you can just stitch them in place if you like.