Understand Applique - Why so many Colors?
Are you new to Applique, or find Applique confusing?
| You are not alone!
10 years ago when I got my first Embroidery Machine, I 'managed' to download a Free Machine Embroidery Applique Design - Full of excitement, I took it to my machine (no pretty computer screens), went to stitch the design, but I couldn't understand all the Colors, and I didn't know what to do.
I stayed away from Applique for quite a while after that!.  Now, the majority of my designs are Applique! Now, the majority of my designs are Applique!
My aim is to take the confusion out of Applique Designs, so you can not only enjoy Applique, but with an understanding of Applique Construction, you can use your Applique Designs in a variety of ways.
|

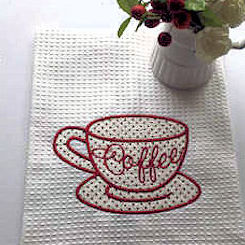
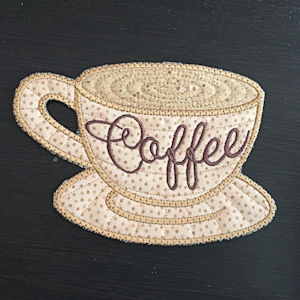
Lets start at the beginning, with our Coffee Cup Applique
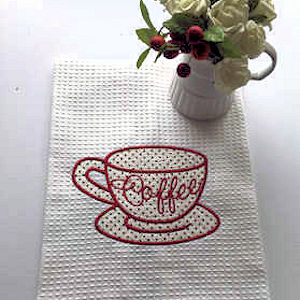 |
It Looks simple enough:
- One Fabric
- Some detail in the Cup (Quilting)
- One Thread Color used
|
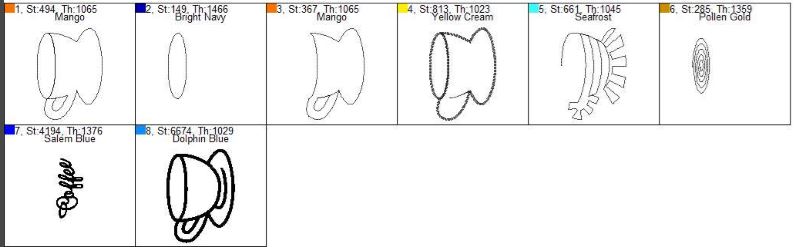
You load the design to your machine, or look in your software, and there are 6 Colors or thread changes.
Why are there extra colors?
To answer this, we need to get into How Applique Designs are Constructed
When we create (digitise) an Applique design, we need the machine to stop at different points, so you can 'do something' ie add, then trim your fabrics.
The way we tell your machine to do this, is to use different colors, because:
- YOUR EMBROIDERY MACHINE WILL AUTOMATICALLY STOP AT THE END OF EACH COLOR.
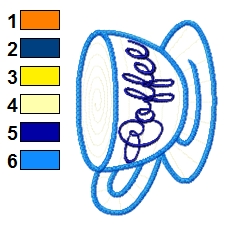
Another way to show this, is with the Color Stitching Sequence, Here you see the six different colors (or steps)

The first three colors are 'construction' stitches.
- Placement Line
- Stitch-down Line
- Zig-zag - Tack-down Stitch
You DO NOT need to change thread colors for construction stitches, you thread your machine with One Color (generally a neutral thread), and use that for all your construction,
Then, you get the next three colors, which are the embroidery and cover stitches, In the Coffee Cup Design we have
- Quilting
- Lettering
- Satin Stitch
You stitch these in any color thread that you like.
|
Now you know the Why all the colors, (they are the very important 'Construction' stitches) - its time for the how
How to stitch an Applique Design
|
 |
Preparation
- Hoop Stabiliser and Fabric together as you would normally
- Thread machine with neutral thread (White)
We know for this design, you do the Construction Stitches First
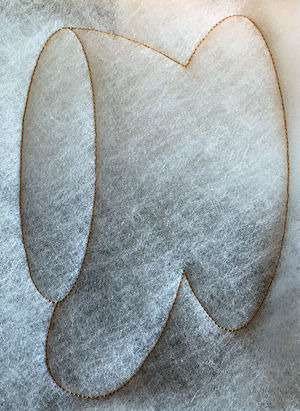
(We used a dark thread for the photos, so you could see)
|
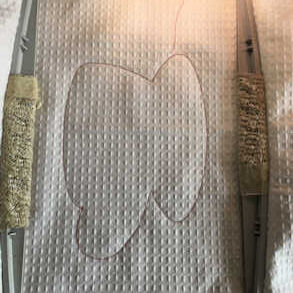
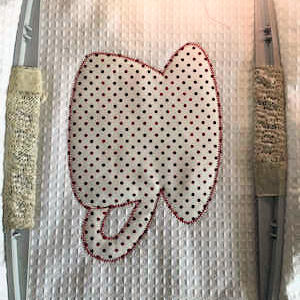
- Stitch Color 1
- Placement Line
|
|
|
|
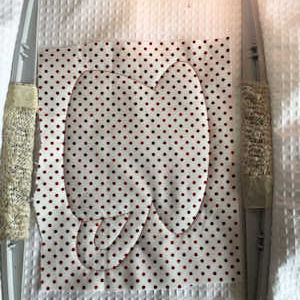
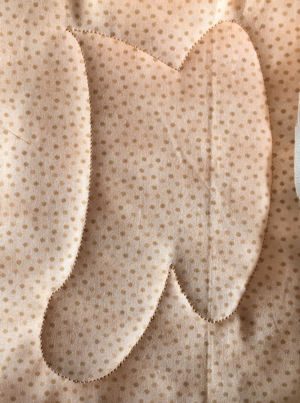
- Place Fabric over the Placement Line
- Stitch Color 2 to attach
|
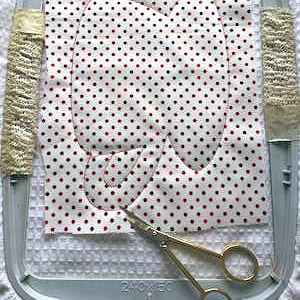
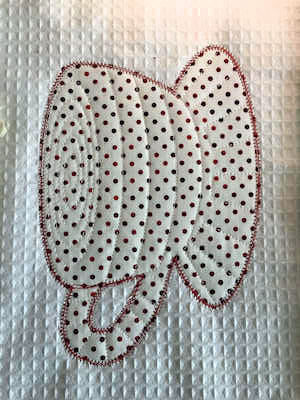
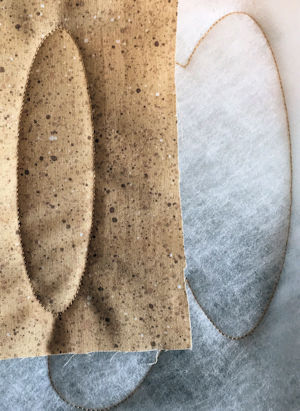
- Remove hoop from machine
- (DO NOT UNHOOP DESIGN)
- Using sharp scissors, Cut away excess Fabric around the edges
Practise makes perfect here!
The closer (and neater) you can trim, makes a professional edge.
|
 |
|
|
|
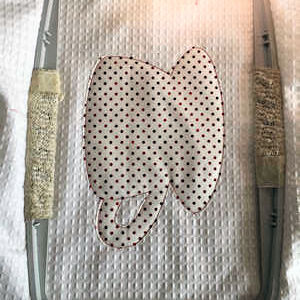
- Stitch Color 3
- Zig-zag (tack down) stitch
|
 |
|
That's your Construction Stitches (in your neutral thread) completed, Now you complete your design in your chosen colors
|
 |
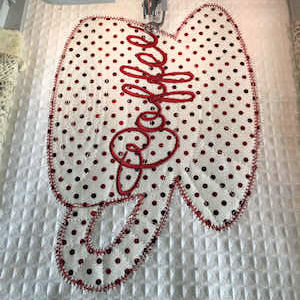
- Stitch Color 4 - White
- Quilting Stitches
If you do not want the Quilting stitches, simply skip to the next color
|
- Stitch Color 5 - Dark Red
- Word Coffee
|
|
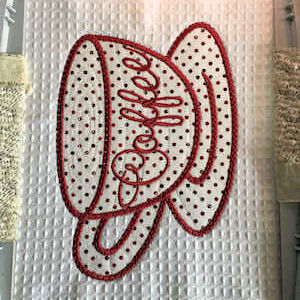 |
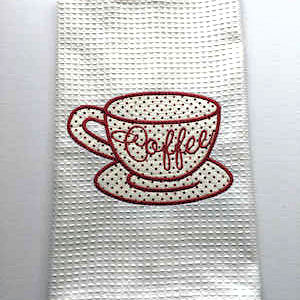
- Stitch Color 6 - Dark Red
- Satin Stitch Outline
|
|
An Applique using multiple Fabrics is created following the same steps:
- Hoop Stabiliser and Fabric
- Thread Machine with a neutral thread
|
 |
- Stitch Color 1
- Placement Guide
|
- Place Fabric over the Placement Line (Top)
- Stitch Color 2 to attach
|
 |
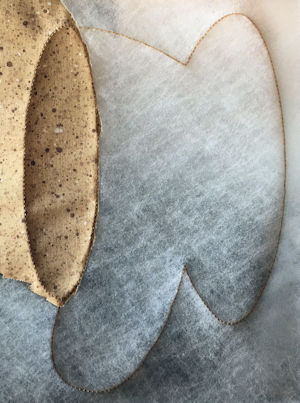 |
Trim away excess Fabric where the 2nd fabric piece will go
(this is to reduce bulk at the seams)
|
- Place Fabric over the Placement Line (Bottom)
- Stitch Color 3 to attach
|
|
 |
Then you follow the exact same steps as before:
- Trim away excess Applique Fabric
- Return hoop to Machine
- Stitch Color 4 - Zag-zag/Tackdown Stitch
- Stitch Color 5 - Quilting - Top (Coffee)
- Stitch Color 6 - Quilting - Cup
- Stitch Color 7 - Wording Coffee
- Stitch Color 8 - Satin Stitch edge
|
|
That's it!
All Applique Designs have construction stitches, which show as separate (or extra) colors.
Your Design files should include written instructions on how to stitch your Applique Designs, but watch a few designs stitch-out, and you will get very familiar with 'the construction stitches, which will enable you to edit and enhance your designs.
and try for yourself - (5X7 Hoop Required)
Formats included: DST EXP HUS JEF PES VIP VP3 XXX
RE-SIZING
I know there is an 'industry standard/guideline that you can re-size 'most' designs 10-20%,
BE VERY MINDFUL if you re-size an applique design
- If you make the design smaller, the Satin Stitch edging will be thinner, and may not cover your trimmed fabric
- If you make the design bigger, the Satin Stitch edging will be wider, and may become too wide for your machine to stitch.
- In both instances, any Satin Stitch curves or corners, may not stitch as nicely, as the original
|
|
|
Index
Previous
Next