
How to make a Raggy Quilt
HOW TO MAKE A RAGGY QUILT
by Darina and Kim
What is a Raggy Quilt?
Raggy Quilts are Quilts where the Blocks (front. batting/wadding and backing) are stitched together leaving exposed seams. These seams are then snipped/cut. Once washed and dried, the seams fray 'up' to leave a beautiful raggy finish.
With our wonderful embroidery machines, we can create the entire block in-the-hoop, then quickly stitch the sides together on our sewing machines.
|
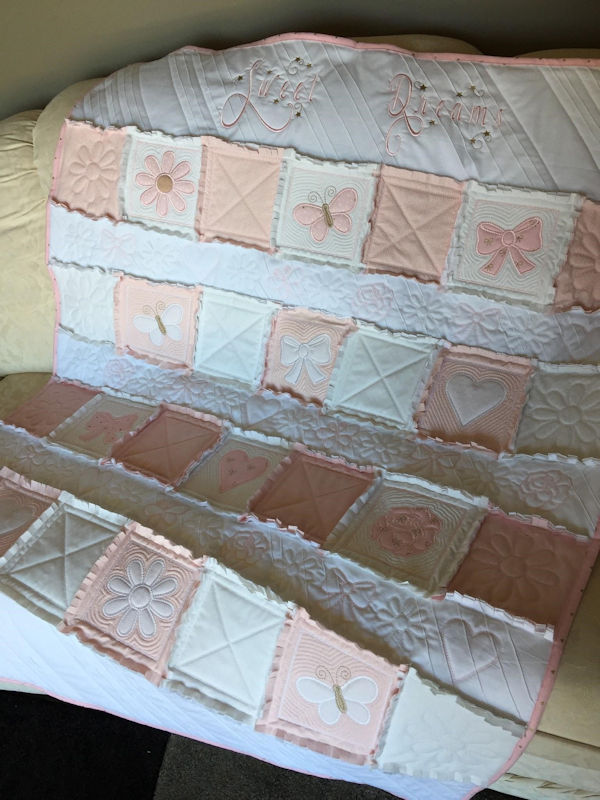
Darina has shared many photos of her beautiful Raggy Quilts, and all of us in the Admin team have asked her for some instructions. Darina requested some simple designs, Darina and Kim had a 'sew-over' and this is the absolutely stunning quilt and instructions Darina and Kim created together. Kim created the beautiful Sweet Dreams wording that enhances this Quilt, and has kindly shared this design for the 'Quilted Sweet Dreams' Design Set |
 |
Kim writes: This design has special meaning as the testing and blog was done together by Darina & myself during our first meeting. 24 hours spent together with lots of laughs and building on a friendship that started all because of Heather’s beautiful designs. We hope you enjoy it as much as we did! |
The Raggy Quilt Technique can be used with any design or patterned fabric of your choosing
SUPPLIES
Fabric For Darina's Sweet Dream Quilt Darina used approximately 2 meters of fabric each for the front and back of the quilt.
Wadding The puffier the wadding, the more the design lifts from the fabric and looks 3D
Stabiliser - No show mesh
**Why no-show mesh - with this technique, the stabiliser is left in the block, therefore in the completed quilt. The no-show mesh adds no weight, and keeps the blocks nice and soft. Tear-away would 'glug' up once washed.
Coordinating thread/s
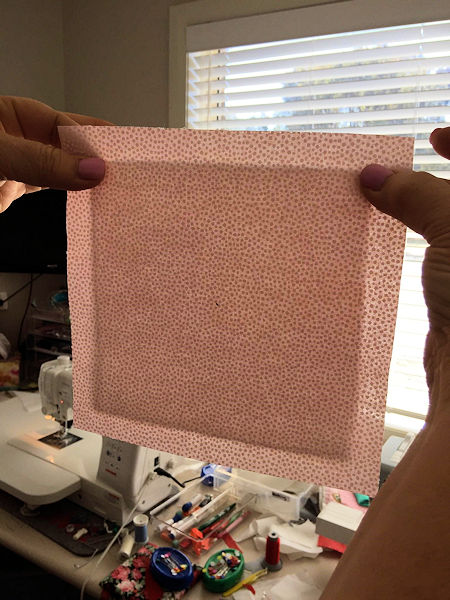
For this quilt Darina chose a series of coordinating fabric in pinks and whites but the choice is yours to make.
PREPARATION
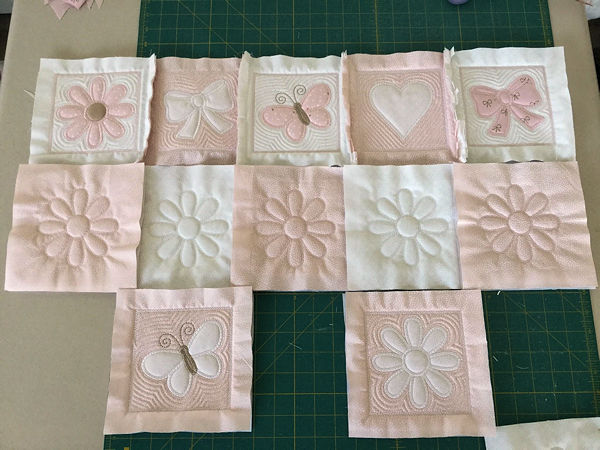
Darina created her Quilt using the 5x5 Quilted Sweet Dream Designs
- For the 5x5 design…
- Cut your top and back fabric into 7 inch squares
- Cut your wadding into 6 inch squares
If you are concerned about hooping accuracy, you can cut an inch larger and trim back later.
If you want to use the larger designs, simply add an inch to your block size
ie 8x8 Designs - cut wadding 9x9 and front/back fabric 10x10 inch
EMBROIDERY - Block with embroidered design
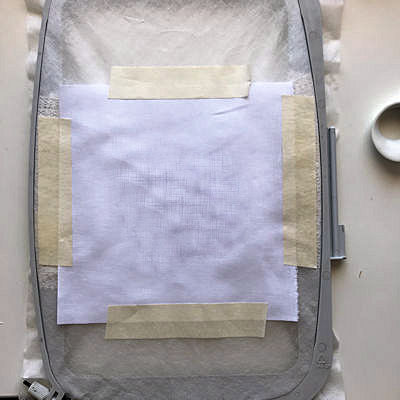
Hoop ‘no show mesh’
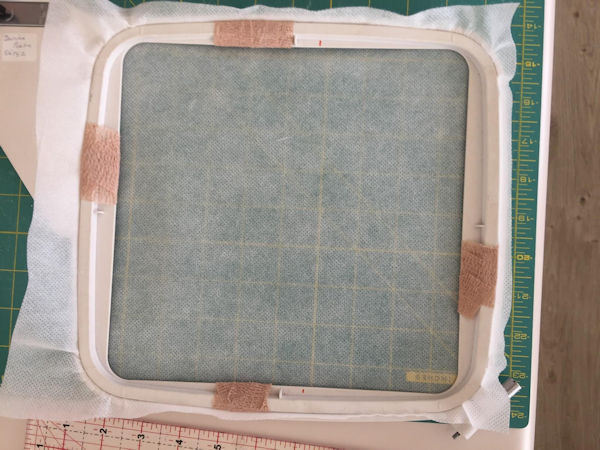
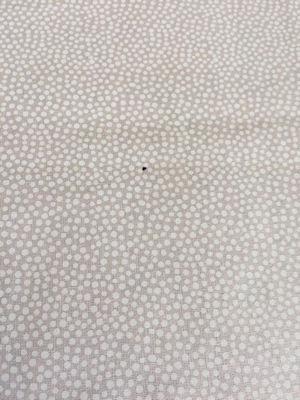
Find centre of your precut fabric square and mark
 |
 |
Centre your wadding in the middle of the fabric (hold up to light), or mark the centre of both pieces and put a pin through to line up.
Once centred, place the wadding and top fabric on your hooped stabiliser. Centre them in your hoop & pin in place. Make sure the pins are away from your stitch area.
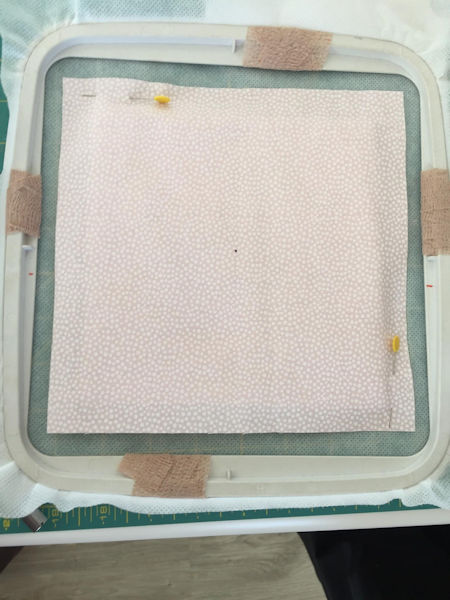
if you can, use your machine to line up the needle with the centre dot
 |
 |
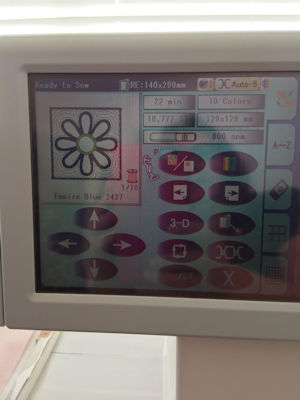
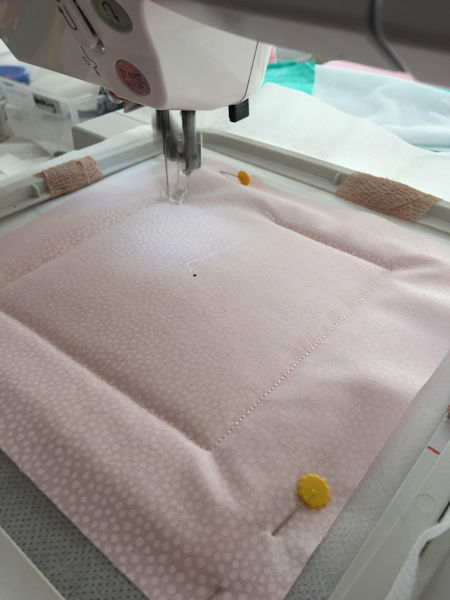
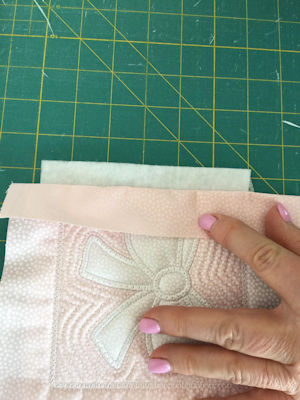
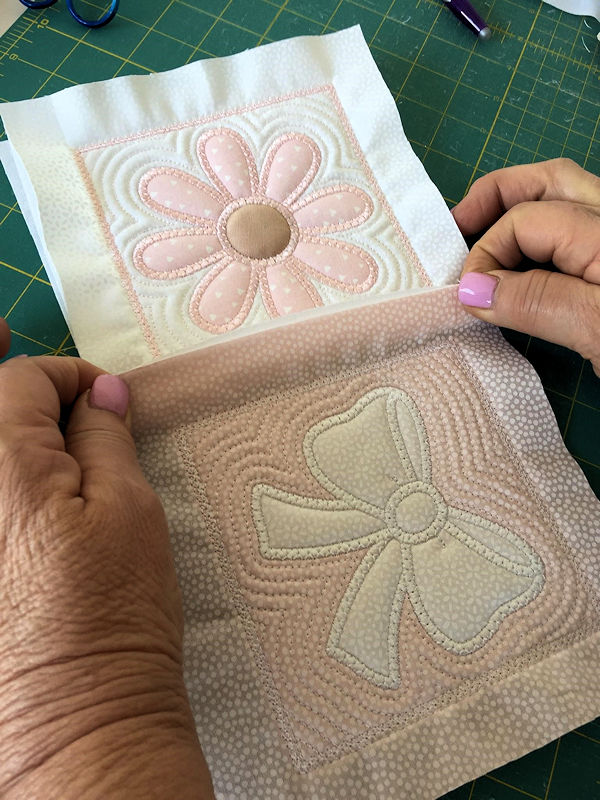
Stitch Color 1 -Block outline. This will attach your layers together.
Stitch your chosen embroidery design
If you want to use your own embroidery design, you can use one of the chain blocks from the Quilted Sweet Dreams set (without quilting). and substitute your own design before the last two colors
ADD BACKING
 |
Remove hoop from Machine, and tape Backing Fabric to hoop Wrong Side of Fabric facing Hoop |
Return hoop to machine
Stitch the last 2 Colors which attachs the backing, and stitches the decorative frame.

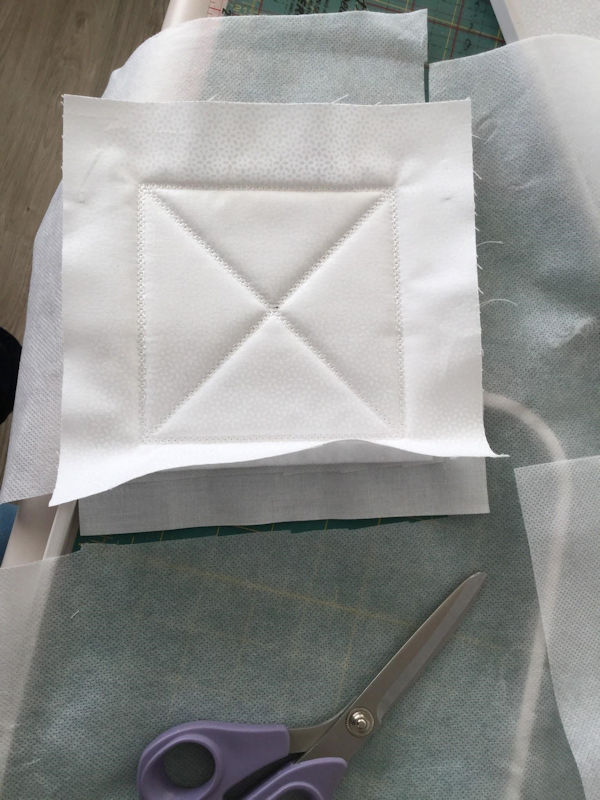
EMBROIDERY - X Design (filler block)
Many of Darina's Raggy Quilts have been made entirely with this X Block
When doing the plain x block you hoop your wadding, top fabric and backing fabric all at the same time, being careful to line all of them up, using the methods shown previously. Once completed, trim away the no show mesh
DOWNLOAD X BLOCK
ASSEMBLY
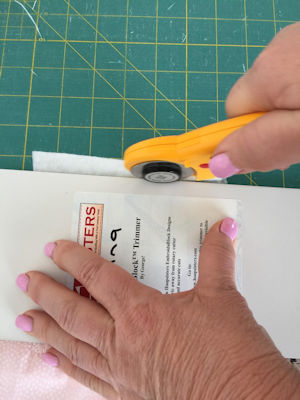
TRIM WADDING/BATTING
Darina has a nifty tool she purchased from Hoop Sisters which allows her to pull the fabric aside and hold it in place while she trims the batting/wadding underneath. Make sure your backing fabric is tucked away under as well.
 |
 |
 |
|
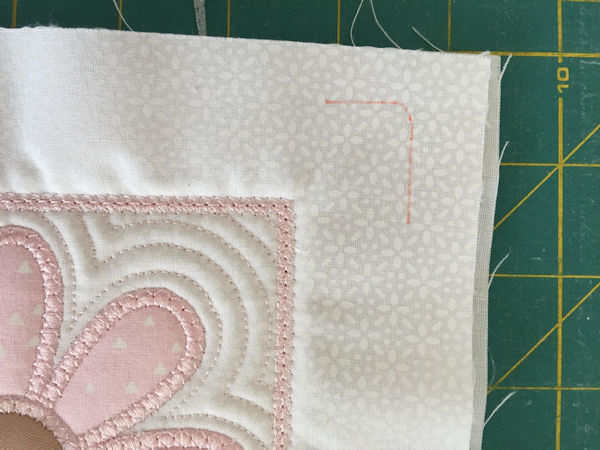
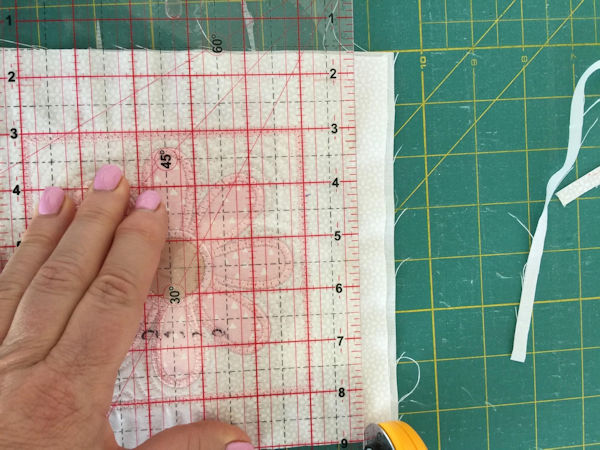
TRIM BLOCKS TO SIZE
Blocks need to be trimmed to perfect size. If you have chosen to cut your blocks to the finished size this process will be minimal. If you have chosen to cut them a little larger, you will need to cut them back accurately.
Using your square quilting ruler to mark your lines to trim away excess fabric, or use a straight ruler and the gridlines on your cutting mat to line them up with your ruler and your stitched square.
Darina cut 1 inch each side of the decorative stitch - you can make your blocks bigger if you choose.
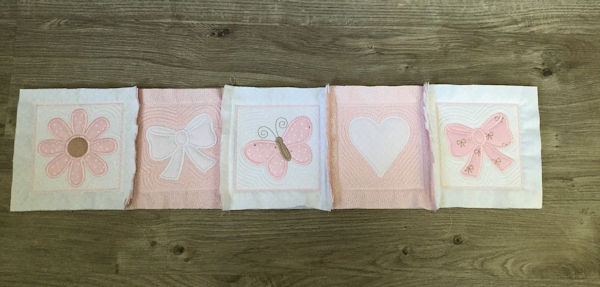
CHOOSE LAYOUT
Lay your full quilt out on the floor or the likes and take a photo so you can reference back if something gets out of place!
JOINING BLOCKS
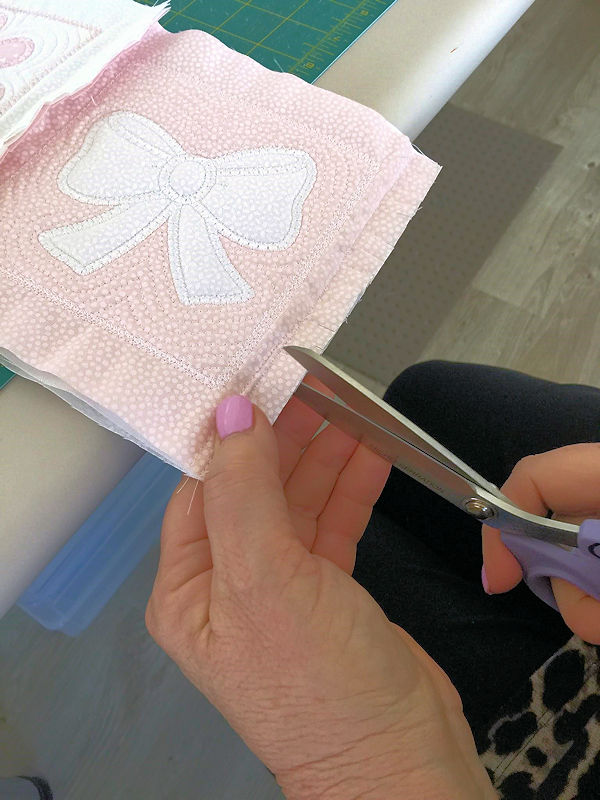
With ALL Seams facing up, stitch a full row together using a ½ to ¾ inch seam. Do not catch the wadding/batting in the seam.

When your row is complete, turn and clip each small seam (about 1/4 inch between)
Complete all your rows.
Stitch your rows together - Clip each row as you go. Fold your work so the seam is facing you off the edge of your bench. Clip away. You will be thankful later as there will not be a big clipping job at the end!
If you accidentally clip through the seam, return the quilt to your machine and immediately re sew the seam. Do not leave until later as you will never find it again and it will begin to unravel.
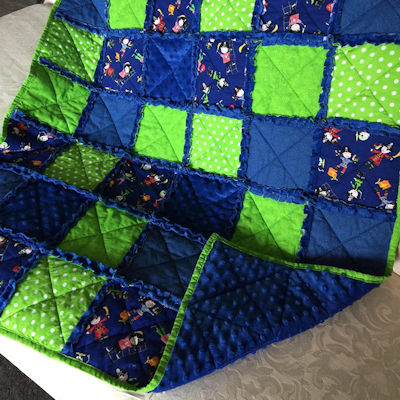
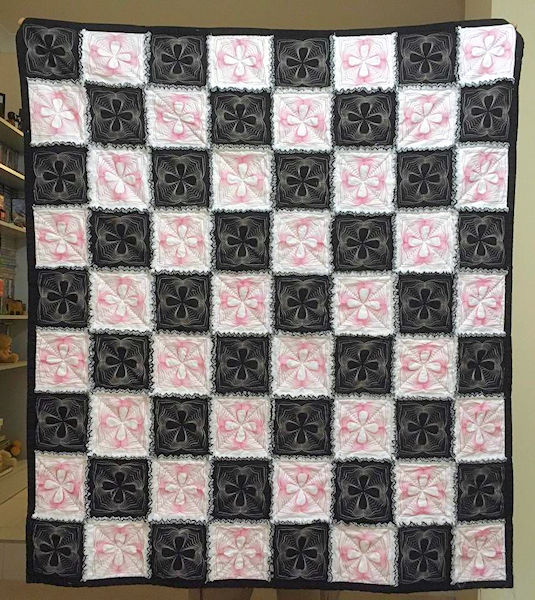
As you can see from Darina's Sunbonnet Raggy Quilt below, you can make a quilt entirely from square blocks.
If you choose this option, then when stitching the completed rows together, just flip one seam one way and the other seam the other way. No need to open your seams out flat as they are clipped close anyway. Your blocks will stitch together locking in well as you stitch your rows together.
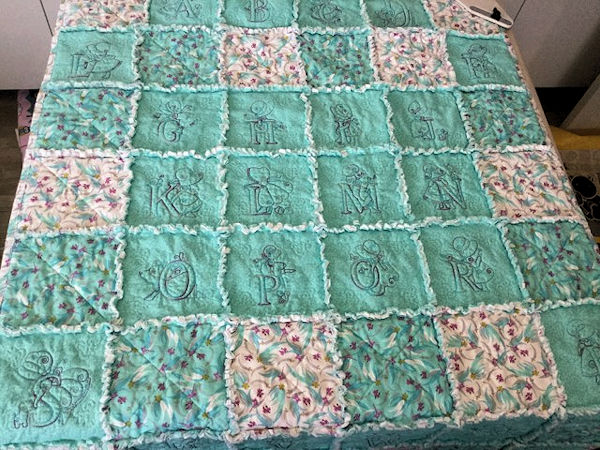
This is where your creativity comes into play as to how you would like your quilt to look. Darina changed her initial Layout to add the plainer X Blocks and added the narrow strip blocks, and the beautiful Sweet Dreams wording Blocks.
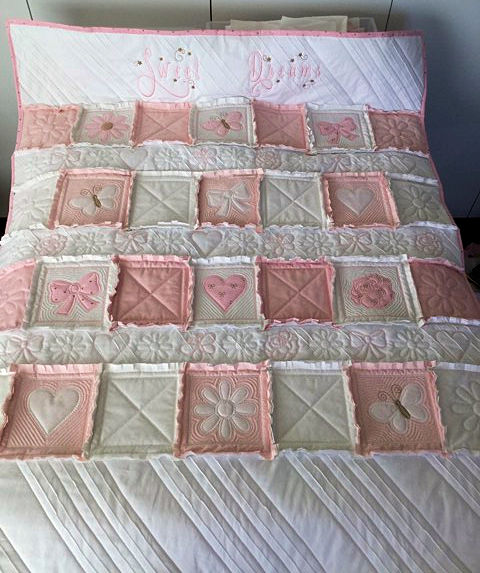
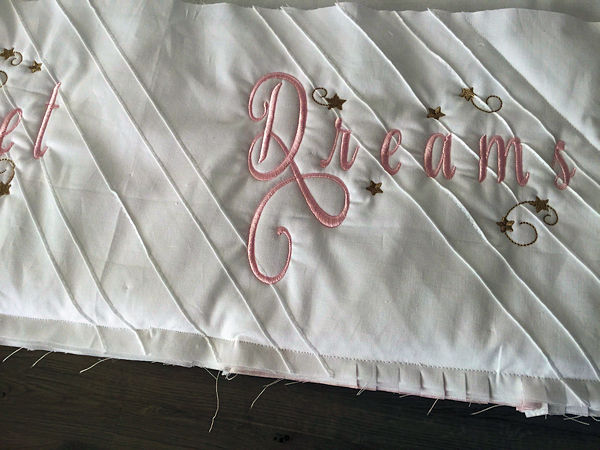
TOP PANEL - SWEET DREAMS QUILT
For the top panel Darina had a voile fabric that already had the pintucks on it. She then embroidered the top fabric and the wadding with the Sweet Dreams design. It is cut at 9” deep then the width of your quilt. Darina then put the backing on and and stitched on an angle with the design of the fabric.
SPACER PANEL
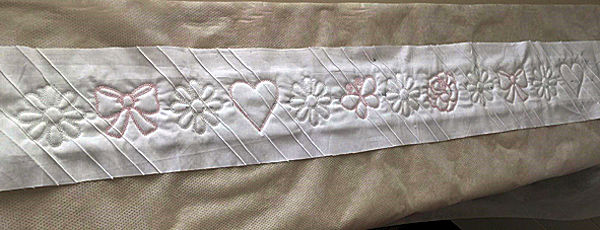
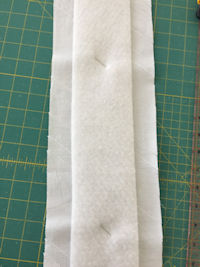
The narrower strips have been cut at 5” and the wadding at 4” or just slightly under.
Darina used the small 4x4 designs - merged 3 into her hoop, then repeated as needed
 |
 |
Another alternative would be to do a few of the small designs and go through all three layers to secure.
Once the whole quilt is stitched together the only thing left to do is bind it. Click here to view detailed instructions on how to make your own binding and mitre your corners
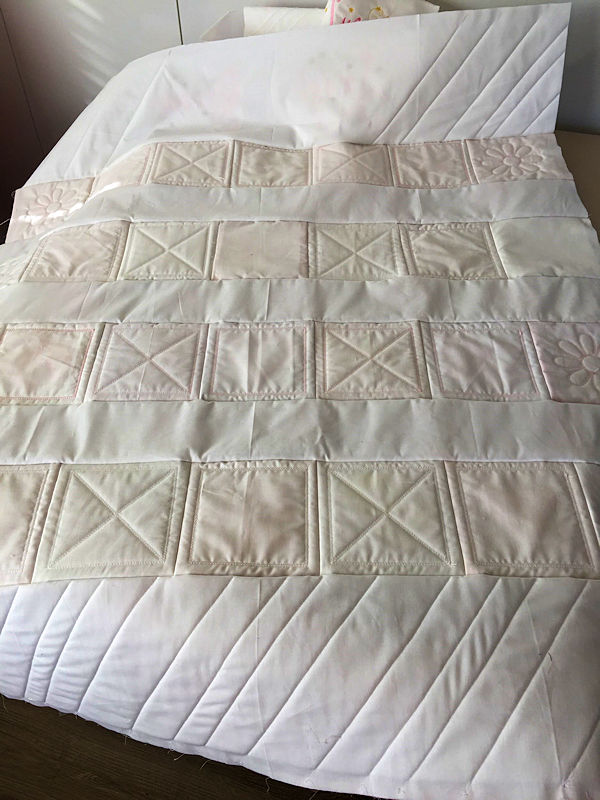
This is how the Quilt looks front and back before you 'rag' the Quilt
'RAG' THE QUILT
To rag a quilt it needs to be put through a gentle wash and then go into a clothes dryer. Some fabrics rag easier than others. For a great finish you can repeat the process. If you don’t own a dryer go to the laundromat as their big machines do a really great job.
Some suggest putting the quilt inside an old doona cover to help catch all the threads. Can also throw in a old towel which will also help with the ‘bits’. Give it a really good shake after each step.
|
For those of you who like to watch step by step videos, Kay has created a video showing how to make a mini version of this quilt |
Just to inspire you, here are just a few photos of Darina's Raggy Quilts - you can make them to any size, and as simple or complex as you like!
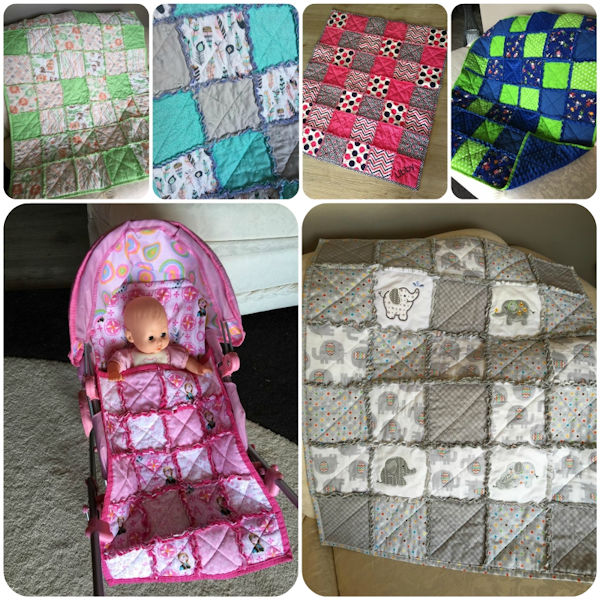
CLICK HERE TO VIEW RAGGY QUILTS MADE BY OUR KREATIVE KIWI GROUP
Here is a Quilt our lovely Faye made using Random Swirls - only 1 design needed!
Note from Heather: Kim and Darina you have created the most beautiful Quilt. I hope you have many more 'sew-overs' I'd love to join you one day!!
You can view more of Darina's awesome creations at Sew Nice by Darina
